


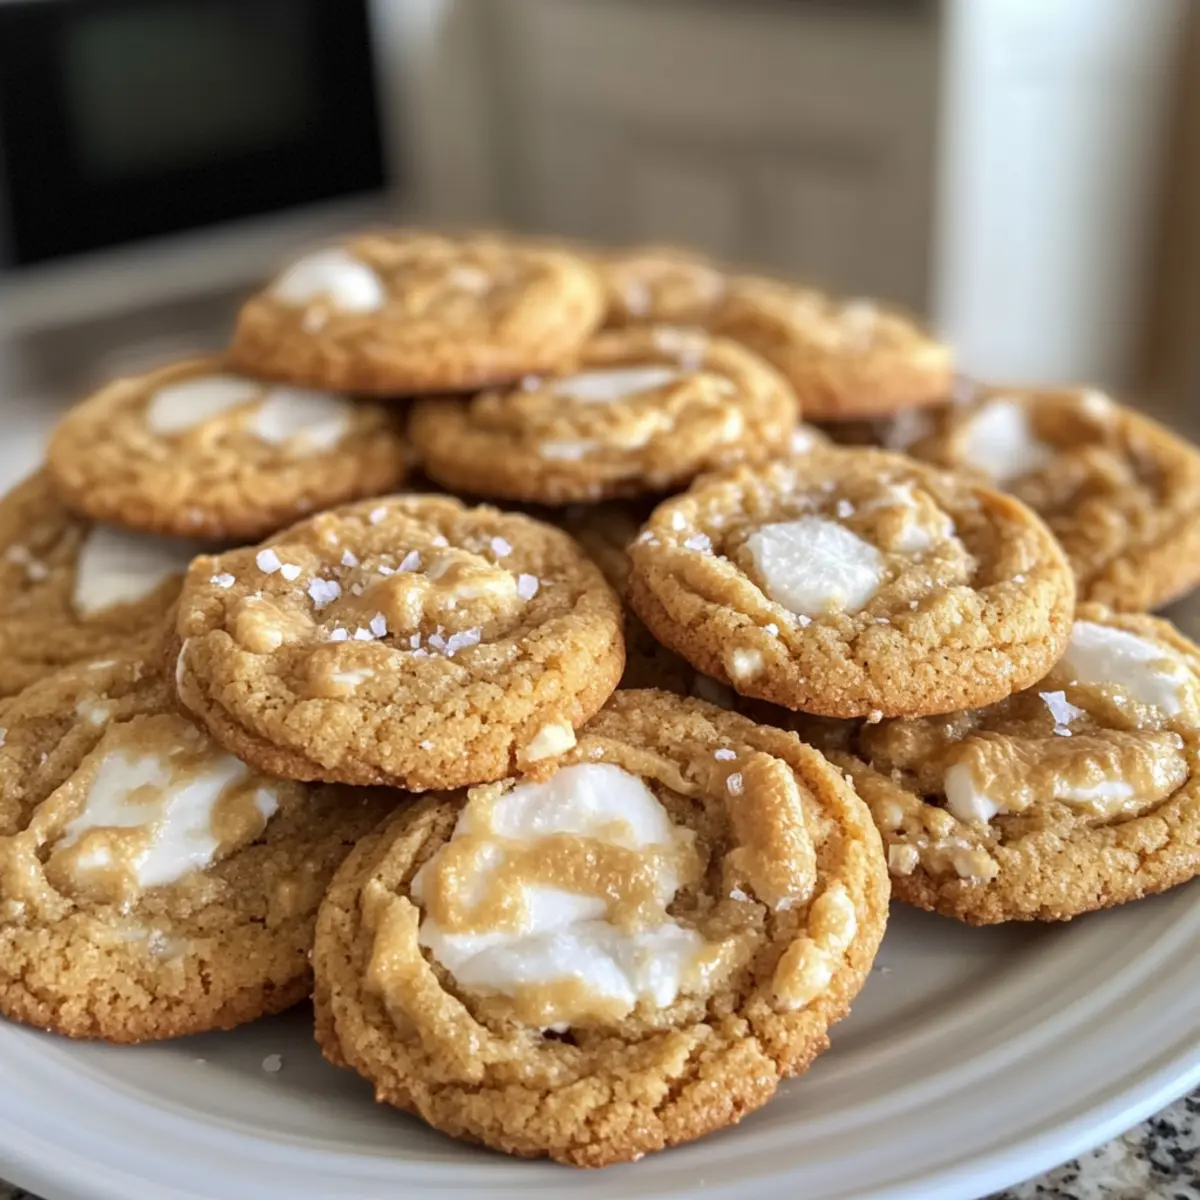
There’s a special magic that happens when you meld the nutty aroma of brown butter with soft, gooey marshmallows. With my Ultimate Brown Butter Marshmallow Pull Cookies, you can easily create this tantalizing fusion in your own kitchen. Not only do these cookies offer a delightful chewiness paired with an irresistible stretch, but they also serve as the perfect comfort dessert for any gathering or late-night craving. Whether you’re a baking novice or a seasoned chef, this recipe combines simple steps with spectacular results. Ready to make a treat that’s sure to impress? Let’s dive into creating these delicious cookies that will have everyone coming back for more!
Why Are These Cookies a Must-Try?
Irresistible Flavor: The nutty brown butter paired with gooey marshmallows offers a rich taste that elevates any cookie lover’s experience.
Easy to Make: With just a handful of ingredients and straightforward steps, you’ll have fresh-baked cookies in no time!
Chewy & Gooey Delight: Each bite combines a crispy edge with a soft center, delivering that mouthwatering marshmallow pull you crave.
Perfect for Sharing: Whether it’s a cozy night in or a party, these cookies are sure to impress friends and family alike. Consider serving them alongside my delightful Easter Sprinkle Cookies for an extra treat!
Customizable Options: Feel free to experiment with mix-ins, from chocolate chips to spices, making this recipe your own.
Brown Butter Cookie Ingredients
For the Cookie Dough
• Brown Butter – Provides a rich, nutty flavor and contributes to a chewy texture; be sure to cook it until golden to enhance the flavor.
• Granulated Sugar – Adds sweetness and aids in cookie browning; no substitution needed unless adjusting for dietary reasons.
• Brown Sugar – Enhances moisture and contributes to a toffee-like flavor; coconut sugar can be used for a different profile.
• Eggs – Acts as a binder and gives structure; make sure they are at room temperature for better emulsification.
• All-Purpose Flour – Creates the foundation of the cookie; substitute with a gluten-free flour blend if needed.
• Baking Soda – Helps cookies rise and expand; no substitutions recommended here.
• Salt – Balances the sweetness and enhances flavor; kosher salt is best for texture.
For the Marshmallow Pull
• Marshmallows – The star ingredient for that gooey marshmallow pull; mini marshmallows can be used for even distribution.
Optional Mix-ins
• Chocolate Chips – Adds additional flavor; opt for dark chocolate for a perfect contrast.
Crafting these brown butter cookies is not just about following a recipe; it’s about creating a comforting experience that leads to delicious memories. You’ll find that each element works harmoniously to create the ultimate treat—ideal for satisfying your sweet tooth or impressing your guests with delightful Lemon S’mores Cookies!
Step‑by‑Step Instructions for Ultimate Brown Butter Marshmallow Pull Cookies
Step 1: Prepare the Brown Butter
In a medium saucepan over medium heat, melt 1 cup of unsalted butter. Stir frequently for about 5–7 minutes until the butter turns a deep golden brown and develops a nutty aroma. Remove from heat and let your browned butter cool slightly for about 10 minutes before mixing it into your dough to ensure it doesn’t scramble the eggs.
Step 2: Mix the Wet Ingredients
In a large mixing bowl, combine the cooled brown butter with ¾ cup of granulated sugar and ¾ cup of packed brown sugar. Using a hand mixer or whisk, beat the mixture until fluffy and well-blended, about 2–3 minutes. Add in 2 large room-temperature eggs, one at a time, ensuring each is fully incorporated before the next addition.
Step 3: Combine the Dry Ingredients
In a separate bowl, whisk together 2 ½ cups of all-purpose flour, 1 teaspoon of baking soda, and ½ teaspoon of kosher salt. This mixture will help your Ultimate Brown Butter Marshmallow Pull Cookies rise perfectly while balancing the sweetness. Be sure to evenly distribute the baking soda and salt for consistent flavor.
Step 4: Incorporate Dry into Wet
Gradually add the dry ingredients into the wet mixture, stirring gently with a wooden spoon or rubber spatula. Mix just until combined, ensuring not to overmix, as this can lead to tough cookies. The dough should be thick and slightly sticky, setting the foundation for deliciously chewy cookies.
Step 5: Fold in the Marshmallows
Carefully fold in 1 ½ cups of mini marshmallows, and if desired, 1 cup of dark chocolate chips for additional flavor. Gently incorporate the mix-ins until they are evenly distributed throughout the dough, ensuring every bite of your brown butter cookies has that incredible marshmallow pull.
Step 6: Chill the Dough
Cover your cookie dough tightly with plastic wrap or place it in an airtight container. Chill in the refrigerator for at least 30 minutes. This step is crucial as it prevents the dough from spreading too much during baking, helping to maintain the chewy texture of your Ultimate Brown Butter Marshmallow Pull Cookies.
Step 7: Scoop and Bake
Preheat your oven to 350°F (175°C). Line two baking sheets with parchment paper for easy release. Using a cookie scoop, place generous tablespoons of dough onto the prepared sheets, spacing them about 2 inches apart. Bake in the preheated oven for 10–12 minutes, until the edges are golden and the centers still appear slightly underbaked.
Step 8: Cool the Cookies
Once baked, remove the cookies from the oven and allow them to cool on the baking sheets for about 5 minutes. This will help them firm up while maintaining that delicious gooey center. Then, transfer them to a wire rack to cool completely—this allows the marshmallows to become even more delightfully stretchy!
What to Serve with Ultimate Brown Butter Marshmallow Pull Cookies
Indulging in warm, gooey cookies is always a treat; let’s explore some delightful pairings to elevate your dessert experience.
- Ice Cream Sundae: Scoop of vanilla or chocolate ice cream drizzled with hot fudge creates a delightful contrast with warm cookies.
- Fresh Berries: Juicy strawberries or raspberries add a refreshing burst and bright flavor, balancing the cookie’s richness.
- Milkshake: A creamy milkshake, especially chocolate or vanilla, complements the chewy texture while enhancing the nostalgic vibes.
- S’mores Dip: Serve a warm s’mores dip alongside for a fun, interactive dessert experience that echoes the marshmallow pull.
- Coffee or Espresso: The rich flavors of coffee or a shot of espresso enhance the cookie’s nuttiness for those cozy afternoon moments.
These combinations invite you to craft a memorable dessert spread, ensuring every bite is a taste of pure comfort.
Expert Tips for Ultimate Brown Butter Marshmallow Pull Cookies
-
Perfect Brown Butter: Make sure to watch the butter closely while browning to prevent burning. The key is a nutty fragrance and golden color for the best flavor.
-
Chill the Dough: Don’t skip the chilling step! This helps the cookies hold their shape and maintain that delightful chewy texture without spreading too much.
-
Avoid Overmixing: Gently fold the ingredients. Overmixing can lead to tough cookies, so stop mixing as soon as you see no dry flour remnants.
-
Baking Time: Keep an eye on the baking time—remove the cookies when the edges are golden and the centers look slightly underbaked for the perfect marshmallow pull.
-
Use Fresh Marshmallows: Fresh marshmallows give the best pull and flavor. If you can, avoid using stale ones for this ultimate cookie treat!
Storage Tips for Ultimate Brown Butter Marshmallow Pull Cookies
-
Room Temperature: Store cookies in an airtight container at room temperature for up to 1 week. This keeps them soft and chewy, ready to enjoy at any moment.
-
Fridge: If you live in a warm climate, consider refrigerating the cookies to maintain freshness. In this case, they will last up to 2 weeks, but be sure to return them to room temperature for the best texture.
-
Freezer: For longer storage, freeze the cookies in a single layer on a baking sheet until firm, then transfer to an airtight container or freezer bag. They can last for up to 3 months.
-
Reheating: To enjoy that melty marshmallow pull again, simply warm the cookies in the microwave for 10-15 seconds. This will bring back their gooey goodness, making them irresistible once more!
Variations & Substitutions for Brown Butter Cookies
Give your cookies a delightful twist by customizing them with these creative ideas that will boost flavor and fun!
-
Nutty Delight: Add chopped walnuts or pecans to the dough for a satisfying crunch. The nuttiness complements the brown butter beautifully, creating a delicious contrast.
-
Sweet Swap: Replace dark chocolate chips with white chocolate for a sweeter bite. This simple twist transforms the flavor profile, making them a creamy indulgence.
-
Fruity Flair: Incorporate lemon zest into the dough for a refreshing citrus kick. The brightness of lemon will elevate the cookies, combining wonderfully with the marshmallow pull.
-
Spiced Cookies: Sprinkle in cinnamon or cardamom for a cozy, aromatic touch. A hint of spice offers warmth and depth, perfect for those chilly evenings.
-
Double Chocolate: Mix in half a cup of cocoa powder for a chocolaty version. These cookies will transform into a decadent chocolate treat, perfect for any chocolate lover.
-
Marshmallow Madness: Use flavored marshmallows, such as caramel or coconut, for a fun twist. This small change can surprise your taste buds and make every bite an adventure.
-
Gooey Center: For an even more gooey texture, place a chocolate square inside each cookie dough ball before baking. Expect a molten chocolate surprise as you bite in!
-
S’mores Vibes: Create a “S’mores” twist by adding crushed graham crackers to the dough. Combine this with mini marshmallows and chocolate chips for a campfire feel right in your kitchen.
Delighted with these ideas? You can customize these cookies just how you like them! Once you’re done baking, consider pairing these delicious treats with a warm cup of coffee or even some creamy homemade ice cream—speaking of which, don’t forget to try them alongside my delightful Easter Sprinkle Cookies for a colorful dessert spread!
Make Ahead Options
These Ultimate Brown Butter Marshmallow Pull Cookies are a dream for meal prep enthusiasts! You can prepare the cookie dough up to 24 hours in advance by following the recipe through Step 6. After mixing in the marshmallows, cover the dough tightly with plastic wrap and refrigerate it—this helps the flavors meld while keeping the dough just as delicious. When you’re ready to bake, scoop the chilled dough onto a baking sheet and proceed with Steps 7 and 8. This method not only saves busy cooks valuable time but also ensures that your cookies have that perfect chewy texture and delightful marshmallow pull straight out of the oven!
Ultimate Brown Butter Marshmallow Pull Cookies Recipe FAQs
What is the best way to select brown butter?
Absolutely! When making brown butter, choose unsalted butter for better control over the salt content in your cookies. Look for a butter that is fresh—avoid any with dark spots or discoloration. The moment you start melting the butter, keep a close eye on it. You’ll want to cook it until it turns a golden brown and releases a nutty aroma, which typically takes about 5-7 minutes over medium heat.
How should I store my cookies for freshness?
For the best experience, keep your cookies in an airtight container at room temperature for up to 1 week. If you live in a warm climate, you might want to refrigerate them, where they’ll stay fresh for about 2 weeks. Just remember to bring them back to room temperature for maximum chewiness when you’re ready to enjoy!
Can I freeze these cookies?
Yes, you can! For optimal preservation, shape the cookies into balls and freeze them on a baking sheet for about 1 hour until firm. Once they are solid, transfer the cookies to an airtight container or freezer bag for up to 3 months. When you’re craving a cookie, simply bake them from frozen, adding a minute or two to the baking time; you’ll have that fresh-baked taste in no time!
What do I do if my cookies spread too much?
Very often, this issue stems from not chilling the dough! To prevent spreading, always chill your cookie dough for at least 30 minutes before baking. If they still spread, ensure you’re using the right flour measure by spooning flour into the measuring cup instead of scooping it directly, which can compact it and lead to too much flour in your dough.
Are these cookies safe for people with allergies?
While these cookies can be a comforting treat, keep in mind that they contain common allergens such as eggs and gluten. If you’re baking for someone with allergies, consider a gluten-free flour blend for those sensitive to wheat. Always double-check the labels of your ingredients, especially for marshmallows, which may contain gluten or other allergens.
Can I adjust the sweetness in this recipe?
Absolutely! If you prefer less sweetness, consider reducing the granulated and brown sugar by up to ¼ cup combined. However, bear in mind that sugar is not only for sweetness; it plays a crucial role in the texture as well. So, make slight adjustments and see how it turns out!
Lemon S'mores Cookies: Cheerful Twist on a Classic Treat
Ingredients
Equipment
Method
- In a medium saucepan over medium heat, melt the unsalted butter. Stir frequently for about 5–7 minutes until the butter turns a deep golden brown and develops a nutty aroma.
- Remove from heat and let your browned butter cool slightly for about 10 minutes before mixing it into your dough.
- In a large mixing bowl, combine the cooled brown butter with granulated sugar and brown sugar. Beat until fluffy and well-blended, about 2–3 minutes.
- Add in the eggs one at a time, ensuring each is fully incorporated before the next addition.
- In a separate bowl, whisk together the all-purpose flour, baking soda, and kosher salt.
- Gradually add the dry ingredients into the wet mixture, stirring gently until combined.
- Carefully fold in marshmallows and chocolate chips until evenly distributed.
- Cover the cookie dough and chill in the refrigerator for at least 30 minutes.
- Preheat your oven to 350°F (175°C) and line baking sheets with parchment paper. Scoop generous tablespoons of dough onto sheets.
- Bake for 10–12 minutes until edges are golden and centers still appear slightly underbaked.
- Allow cookies to cool on the baking sheets for about 5 minutes before transferring to a wire rack to cool completely.