There’s something magical about dessert that brings people together, and this Mocha Ice-Cream Cake is no exception. I remember the first time I made it; the joy on my friends’ faces was priceless. This cake is not just a treat; it’s a quick solution for those busy days when you want to impress without spending hours in the kitchen. With layers of rich coffee and chocolate ice cream, it’s a delightful way to satisfy your sweet tooth. Whether it’s a birthday, a casual get-together, or just a Tuesday, this cake is sure to be a hit!
Why You’ll Love This Mocha Ice-Cream Cake
This Mocha Ice-Cream Cake is a dream come true for anyone who loves dessert but hates complicated recipes. It’s incredibly easy to whip up, requiring minimal baking and just a few simple steps. The combination of coffee and chocolate flavors creates a taste explosion that will leave your taste buds dancing. Plus, it’s perfect for any occasion, making it a versatile addition to your dessert repertoire!
Ingredients for Mocha Ice-Cream Cake
Gathering the right ingredients is the first step to creating this delightful Mocha Ice-Cream Cake. Here’s what you’ll need:
Chocolate sandwich cookies: These form the base of your cake, providing a rich, chocolatey crust. You can use any brand you like, or even make your own if you’re feeling adventurous.
Unsalted butter: This helps bind the cookie crumbs together, giving your crust a nice, firm texture. Unsalted is best to control the saltiness of the cake.
Coffee ice cream: The star of the show! It adds a creamy coffee flavor that pairs beautifully with chocolate. If you prefer a milder taste, vanilla ice cream is a great substitute.
Chocolate ice cream: This layer brings in the rich chocolate flavor that complements the coffee. Feel free to experiment with dark chocolate for a more intense taste.
Heavy whipping cream: Essential for making the fluffy whipped topping that adds a lightness to the cake. Make sure it’s cold for the best results.
Powdered sugar: This sweetens the whipped cream without adding graininess, ensuring a smooth texture.
Vanilla extract: A splash of this enhances the overall flavor, making it even more delicious.
Chocolate syrup: Drizzled on top, it adds a decadent finish. You can use store-bought or homemade for a personal touch.
Brewed coffee: Cooled coffee adds depth to the flavor profile. It’s optional, but I highly recommend it for that extra kick!
For exact measurements, check the bottom of the article where you can find everything listed for easy printing. Happy cooking!
How to Make Mocha Ice-Cream Cake
Creating this Mocha Ice-Cream Cake is a delightful journey that combines simple steps with delicious results. Let’s dive into the process, ensuring you have all the tips you need for success!
Step 1: Prepare the Crust
Start by combining the crushed chocolate sandwich cookies with melted butter in a medium bowl. Mix until the crumbs are evenly coated. This mixture will form the base of your cake. Next, press the cookie mixture firmly into the bottom of a 9-inch springform pan. Make sure it’s compact; this will give your crust a sturdy foundation for the layers to come.
Step 2: Bake the Crust
Preheat your oven to 350°F. Once the crust is pressed into the pan, bake it for about 10 minutes. This step helps to set the crust and enhance the flavors. After baking, remove it from the oven and let it cool completely. Patience is key here; a cool crust will hold up better when you add the ice cream layers.
Step 3: Add Coffee Ice Cream
Once the crust has cooled, it’s time to add the coffee ice cream. Spread the softened coffee ice cream evenly over the crust, making sure to reach the edges. This layer is where the magic begins! After spreading, place the pan in the freezer for about 30 minutes. This will help the coffee layer firm up nicely.
Step 4: Add Chocolate Ice Cream
After the coffee ice cream has set, it’s time for the chocolate layer. Spread the softened chocolate ice cream over the coffee layer, smoothing it out evenly. This combination of flavors is what makes the Mocha Ice-Cream Cake so irresistible! Return the pan to the freezer for another 30 minutes to let this layer firm up as well.
Step 5: Whip the Cream
While the ice cream layers are firming up, let’s prepare the whipped cream topping. In a mixing bowl, whip the heavy cream with powdered sugar and vanilla extract until stiff peaks form. This fluffy topping will add a lightness to your cake. Make sure your cream is cold for the best results; it makes all the difference!
Step 6: Assemble the Cake
Now comes the fun part! Remove the cake from the freezer and spread the whipped cream over the top of the chocolate ice cream layer. Don’t be shy; a generous layer is what you want! Drizzle chocolate syrup and cooled brewed coffee over the whipped cream for that extra touch of decadence. It’s a sight to behold!
Step 7: Freeze the Cake
Finally, cover the cake with plastic wrap and freeze it for at least 4 hours, or until it’s firm. This step is crucial for achieving that perfect slice. Before serving, let the cake sit at room temperature for about 10 minutes to soften slightly. This will make slicing much easier and more enjoyable!
Tips for Success
Use softened ice cream for easy spreading; it makes layering a breeze.
Ensure your whipped cream is cold for the best volume and texture.
Press the crust firmly to avoid crumbling when slicing.
Let the cake sit at room temperature before serving for easier slicing.
Experiment with toppings like crushed nuts or sprinkles for added flair!
Equipment Needed
9-inch springform pan: Essential for easy removal of the cake. A regular cake pan works too, but slicing may be trickier.
Mixing bowls: You’ll need a couple for mixing the crust and whipped cream. Any size will do!
Electric mixer: Perfect for whipping cream quickly. A whisk works, but it’ll take more elbow grease.
Spatula: Handy for spreading ice cream and whipped cream evenly.
Plastic wrap: To cover the cake while it freezes, ensuring it stays fresh.
Variations
Nutty Delight: Add a layer of crushed nuts, like walnuts or almonds, between the ice cream layers for a crunchy texture.
Mint Chocolate: Swap the coffee ice cream for mint chocolate chip for a refreshing twist on the classic flavor.
Vegan Option: Use dairy-free ice cream and coconut cream for the whipped topping to create a vegan-friendly version.
Fruit Fusion: Layer in some fresh raspberries or strawberries between the ice cream layers for a fruity burst.
Espresso Boost: Mix in a layer of crushed espresso beans with the coffee ice cream for an extra caffeine kick.
Serving Suggestions
Fresh Berries: Serve with a side of fresh strawberries or raspberries for a pop of color and flavor.
Espresso: Pair with a shot of espresso or a rich coffee to enhance the mocha experience.
Chocolate Shavings: Garnish with chocolate shavings or cocoa powder for an elegant touch.
Whipped Cream: Add extra whipped cream on the side for those who love a creamy finish.
Presentation: Slice the cake into wedges and serve on chilled plates for a stunning presentation.
FAQs about Mocha Ice-Cream Cake
Can I make Mocha Ice-Cream Cake ahead of time?
Absolutely! This cake is perfect for making ahead. Just prepare it a day or two in advance and keep it in the freezer. It’ll be ready to impress your guests when you are!
What if I don’t have a springform pan?
No worries! You can use a regular cake pan, but be prepared for a bit of a challenge when it comes to slicing. Just line the pan with parchment paper for easier removal.
Can I use different flavors of ice cream?
Definitely! Feel free to mix and match your favorite flavors. Vanilla, mint chocolate chip, or even strawberry can create a fun twist on the classic Mocha Ice-Cream Cake.
How do I store leftovers?
Store any leftovers in the freezer, covered with plastic wrap. It should stay fresh for about a week, but trust me, it’s hard to resist finishing it sooner!
Is this cake suitable for kids?
Yes! The Mocha Ice-Cream Cake is a hit with kids, too. Just keep in mind the coffee flavor; if you want to tone it down, use vanilla ice cream instead!
Final Thoughts
Creating this Mocha Ice-Cream Cake is more than just a cooking project; it’s an experience filled with joy and satisfaction. Each layer tells a story, from the crunchy cookie crust to the creamy ice cream and fluffy whipped topping. It’s a dessert that brings smiles and sparks conversations, making it perfect for gatherings or quiet nights at home. The best part? It’s simple enough for anyone to make, yet impressive enough to wow your guests. So, roll up your sleeves, gather your ingredients, and let this delightful cake become a cherished part of your dessert repertoire!
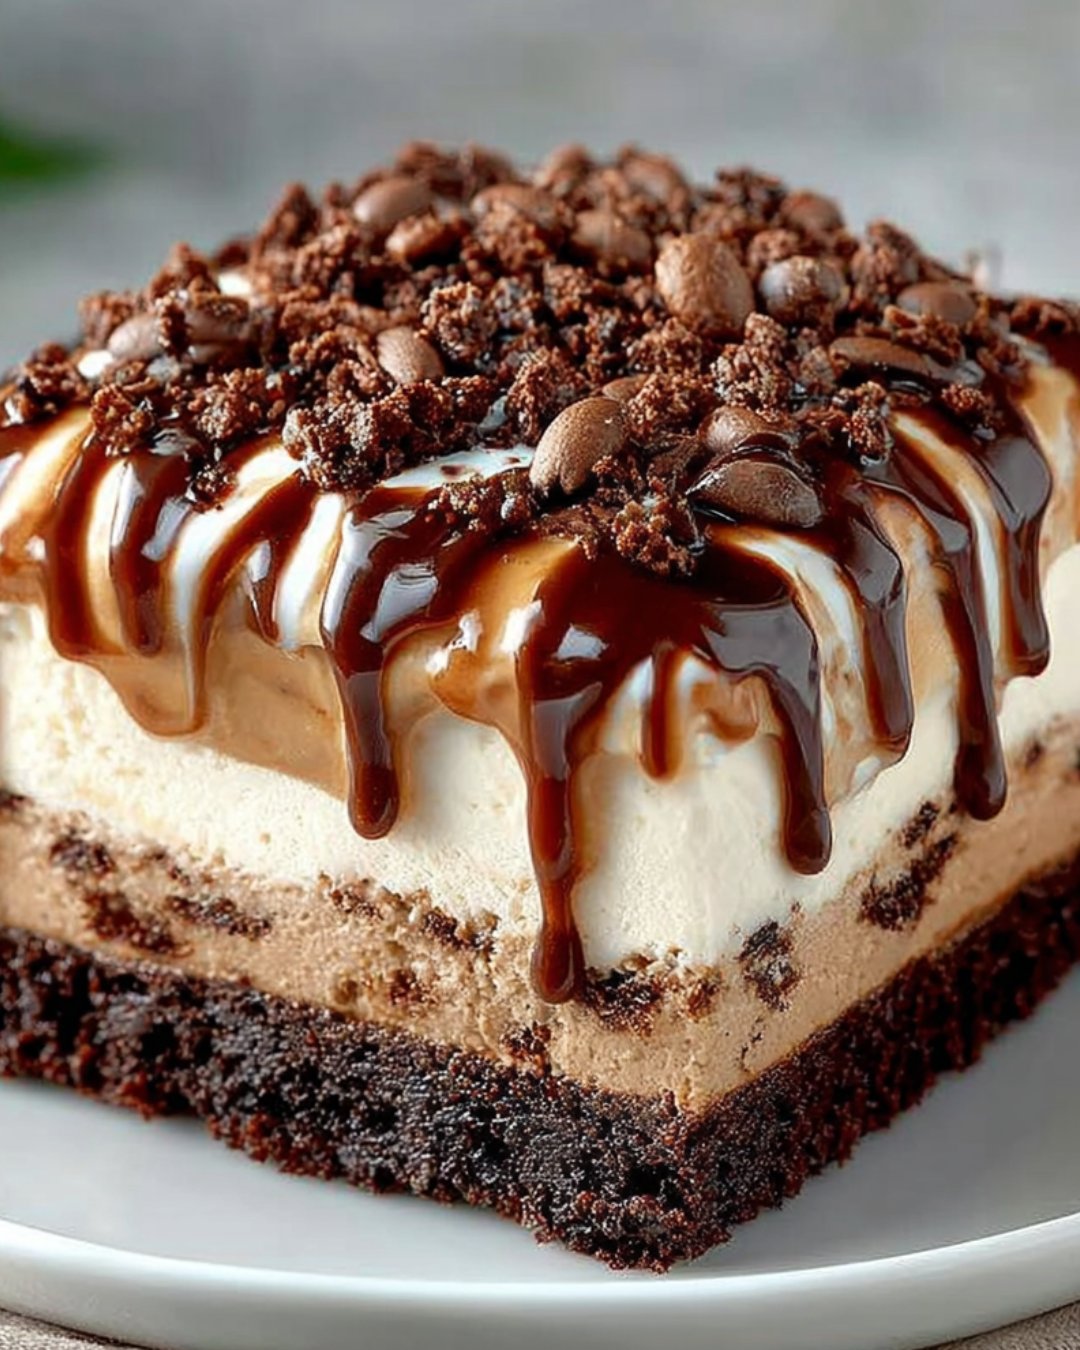
A delicious Mocha Ice-Cream Cake made with layers of coffee and chocolate ice cream, topped with whipped cream and chocolate syrup.
Ingredients
Scale
2 cups chocolate sandwich cookies, crushed
4 tablespoons unsalted butter, melted
1 quart coffee ice cream, softened
1 quart chocolate ice cream, softened
1 cup heavy whipping cream
1/4 cup powdered sugar
1 teaspoon vanilla extract
1/2 cup chocolate syrup
1/2 cup brewed coffee, cooled
Instructions
Preheat your oven to 350°F. In a medium bowl, combine the crushed chocolate sandwich cookies and melted butter. Mix until the crumbs are evenly coated.
Press the cookie mixture firmly into the bottom of a 9-inch springform pan to form the crust. Bake for 10 minutes, then remove from the oven and let it cool completely.
Once the crust is cool, spread the softened coffee ice cream evenly over the crust. Place the pan in the freezer for about 30 minutes to firm up.
After the coffee ice cream has set, spread the softened chocolate ice cream over the coffee layer. Return the pan to the freezer for another 30 minutes.
In a mixing bowl, whip the heavy cream with powdered sugar and vanilla extract until stiff peaks form.
Remove the cake from the freezer and spread the whipped cream over the top of the chocolate ice cream layer. Drizzle chocolate syrup and cooled brewed coffee over the whipped cream.
Cover the cake with plastic wrap and freeze for at least 4 hours, or until firm.
Before serving, let the cake sit at room temperature for about 10 minutes to soften slightly. Carefully remove the sides of the springform pan and slice to serve.
Notes
For a richer flavor, try adding a layer of crushed espresso beans between the ice cream layers.
You can also substitute the coffee ice cream with vanilla for a milder taste.