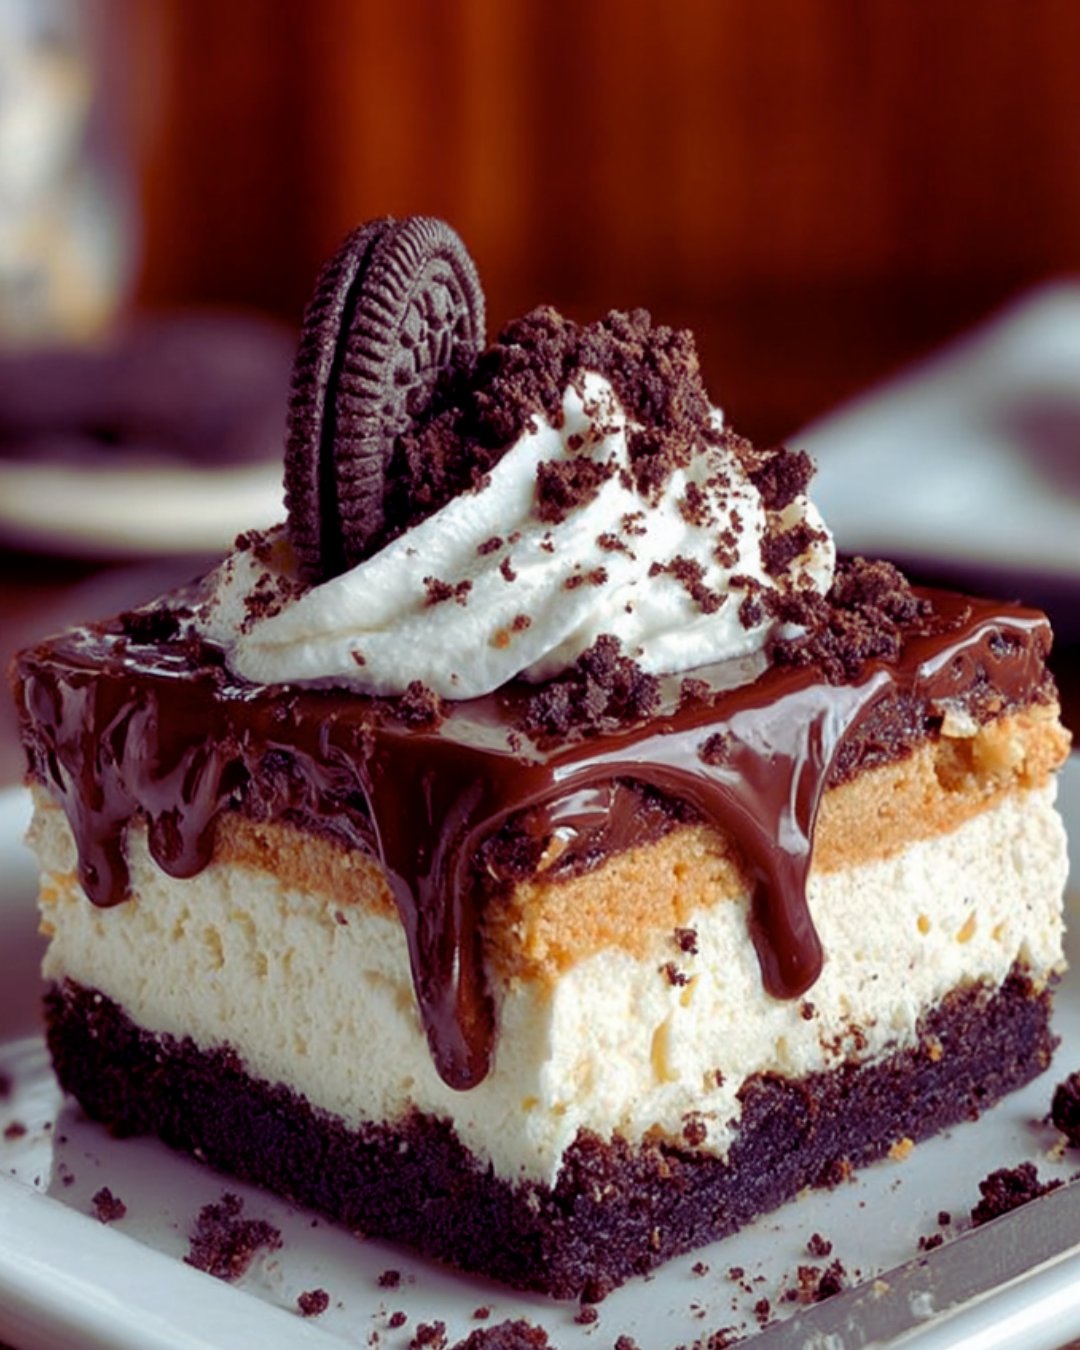
Introduction to No Bake Chocolate Peanut Butter Oreo Dessert
There’s something magical about desserts that require no baking. The No Bake Chocolate Peanut Butter Oreo Dessert is a perfect example. It’s a delightful treat that combines the rich flavors of chocolate and peanut butter, all while saving you time in the kitchen. Whether you’re hosting friends or just craving something sweet after a long day, this dessert is your go-to solution. It’s quick, easy, and sure to impress anyone who takes a bite. Plus, who can resist that creamy, dreamy layer of peanut butter goodness? Let’s dive into this delicious adventure!
Why You’ll Love This No Bake Chocolate Peanut Butter Oreo Dessert
This dessert is a game-changer for anyone who loves sweet treats but hates the hassle of baking. It comes together in just 20 minutes, making it perfect for busy weeknights or last-minute gatherings. The combination of creamy peanut butter and rich chocolate is simply irresistible. Plus, there’s no oven required, so you can keep your kitchen cool while still serving up something delicious. What’s not to love?
Ingredients for No Bake Chocolate Peanut Butter Oreo Dessert
Gathering the right ingredients is the first step to creating this delightful No Bake Chocolate Peanut Butter Oreo Dessert. Here’s what you’ll need:
Oreo cookies: The star of the crust, these chocolatey cookies provide a sweet and crunchy base.
Unsalted butter: This helps bind the crushed Oreos together, adding richness to the crust.
Creamy peanut butter: The heart of the dessert, it brings that luscious, nutty flavor we all crave.
Powdered sugar: This sweetens the peanut butter filling and gives it a smooth texture.
Heavy whipping cream: Essential for creating a light and airy texture in the filling.
Vanilla extract: A splash of this adds depth and enhances the overall flavor.
Semi-sweet chocolate chips: These are melted for the decadent topping that ties everything together.
Vegetable oil: A little bit of oil helps the chocolate melt smoothly and drizzle easily.
For those looking to mix things up, consider adding chopped peanuts or crushed pretzels to the peanut butter layer for a delightful crunch. If you want a different flavor profile, swap the Oreos for chocolate graham crackers. You can find the exact measurements for each ingredient at the bottom of the article, ready for printing!
How to Make No Bake Chocolate Peanut Butter Oreo Dessert
Creating the No Bake Chocolate Peanut Butter Oreo Dessert is a breeze. Follow these simple steps, and you’ll have a delicious treat ready to impress your family and friends. Let’s get started!
Step 1: Prepare the Oreo Crust
First, grab those crushed Oreo cookies and melted butter. In a medium bowl, combine them until the cookies are fully coated. The mixture should resemble wet sand.
Then, take a 9×9-inch baking dish and press the cookie mixture firmly into the bottom. This will form a solid crust that holds everything together. Make sure it’s even; a good base is key to a great dessert!
Step 2: Make the Peanut Butter Filling
Next up, it’s time for the star of the show: the peanut butter filling. In a separate bowl, mix the creamy peanut butter and powdered sugar until smooth.
This mixture should be thick and luscious. Spread it evenly over the Oreo crust, making sure to cover every inch. The combination of flavors is already mouthwatering!
Step 3: Whip the Cream
Now, let’s add some lightness to our dessert. In another bowl, whip the heavy cream and vanilla extract until stiff peaks form.
This means when you lift the whisk, the cream should hold its shape. Gently fold half of this whipped cream into the peanut butter mixture. Then, fold in the remaining whipped cream until no streaks remain. This step is crucial for that airy texture!
Step 4: Assemble the Layers
With the whipped cream mixed in, it’s time to assemble the layers. Spread the peanut butter and whipped cream mixture over the peanut butter layer in the baking dish.
Use a spatula to smooth it out evenly. This layer is where the magic happens, so take your time to make it look nice!
Step 5: Prepare the Chocolate Topping
Now for the crowning glory: the chocolate topping. In a microwave-safe bowl, combine the semi-sweet chocolate chips and vegetable oil.
Microwave in 30-second intervals, stirring in between, until the chocolate is melted and smooth. Drizzle this melted chocolate over the top of the dessert. If you want, use a spatula to spread it evenly for a beautiful finish.
Step 6: Chill and Serve
Finally, it’s time to let this dessert set. Refrigerate it for at least 4 hours, or until it’s firm.
Once it’s ready, cut it into squares and serve chilled. Each bite will be a delightful mix of chocolate and peanut butter that everyone will love!
Tips for Success
Use room temperature peanut butter for easier mixing.
Don’t skip the chilling time; it helps the layers set perfectly.
For a cleaner cut, use a warm knife to slice the dessert.
Feel free to customize with toppings like crushed nuts or drizzled caramel.
Store leftovers in an airtight container in the fridge for up to a week.
Equipment Needed
9×9-inch baking dish: A square dish is ideal, but any similar-sized dish will work.
Mixing bowls: Use a few different sizes for mixing ingredients.
Whisk or electric mixer: A whisk works, but an electric mixer saves time.
Spatula: Essential for spreading and smoothing layers.
Microwave-safe bowl: For melting chocolate; any heat-safe bowl will do.
Variations
Nutty Delight: Add chopped peanuts or almond pieces to the peanut butter layer for an extra crunch.
Gluten-Free Option: Substitute Oreos with gluten-free chocolate sandwich cookies to make this dessert suitable for gluten-sensitive friends.
Vegan Twist: Use vegan butter, dairy-free chocolate chips, and a plant-based whipped cream alternative for a vegan-friendly version.
Mint Chocolate: Mix in a few drops of peppermint extract to the chocolate topping for a refreshing minty flavor.
Fruit Fusion: Layer in some sliced bananas or strawberries between the peanut butter and whipped cream layers for a fruity twist.
Serving Suggestions
Pair with a scoop of vanilla ice cream for a delightful contrast.
Serve alongside fresh berries for a pop of color and freshness.
Drizzle extra chocolate sauce on top for an indulgent touch.
Garnish with crushed Oreos or chopped peanuts for added texture.
Enjoy with a cold glass of milk or a rich coffee for the perfect balance.
FAQs about No Bake Chocolate Peanut Butter Oreo Dessert
Can I make this dessert ahead of time?
Absolutely! The No Bake Chocolate Peanut Butter Oreo Dessert is perfect for making ahead. Just prepare it the day before and let it chill overnight. This allows the flavors to meld beautifully.
How long can I store leftovers?
You can store any leftovers in an airtight container in the fridge for up to a week. Just be sure to keep it chilled to maintain that creamy texture!
Can I use crunchy peanut butter instead of creamy?
Yes, you can! Using crunchy peanut butter will add a delightful texture to the filling. Just keep in mind that it will change the overall smoothness of the dessert.
What can I substitute for Oreos?
If you want to switch things up, chocolate graham crackers work wonderfully as a substitute. They’ll give a different flavor while still providing that delicious chocolatey base.
Is this dessert suitable for kids?
<pDefinitely! The No Bake Chocolate Peanut Butter Oreo Dessert is a hit with kids. Just be mindful of any allergies, especially to peanuts or dairy, when serving.
Final Thoughts
Creating the No Bake Chocolate Peanut Butter Oreo Dessert is more than just whipping up a sweet treat; it’s about sharing joy with those you love. Each layer tells a story, from the crunchy Oreo crust to the creamy peanut butter filling and the rich chocolate topping. This dessert is perfect for any occasion, whether it’s a family gathering or a quiet night in. The smiles and satisfied sighs from your loved ones will be the best reward. So, roll up your sleeves, gather your ingredients, and let this delightful dessert bring happiness to your table!
A delicious and easy-to-make no bake dessert featuring layers of Oreo crust, creamy peanut butter filling, and a rich chocolate topping.
Ingredients
Scale
24 Oreo cookies, crushed
1/2 cup unsalted butter, melted
1 cup creamy peanut butter
1 cup powdered sugar
1 cup heavy whipping cream
1 teaspoon vanilla extract
1 cup semi-sweet chocolate chips
2 tablespoons vegetable oil
Instructions
In a medium bowl, combine the crushed Oreo cookies and melted butter. Mix until the cookies are evenly coated.
Press the cookie mixture into the bottom of a 9×9-inch square baking dish to form a crust. Set aside.
In a separate bowl, mix the peanut butter and powdered sugar until well combined and smooth. Spread the peanut butter mixture evenly over the Oreo crust.
In another bowl, whip the heavy cream and vanilla extract until stiff peaks form. Gently fold half of the whipped cream into the peanut butter mixture until combined. Then fold in the remaining whipped cream until no streaks remain.
Spread the peanut butter and whipped cream mixture over the peanut butter layer in the baking dish.
In a microwave-safe bowl, combine the chocolate chips and vegetable oil. Microwave in 30-second intervals, stirring in between, until the chocolate is melted and smooth.
Drizzle the melted chocolate over the top of the dessert. Use a spatula to spread it evenly if desired.
Refrigerate the dessert for at least 4 hours, or until set.
Cut into squares and serve chilled.
Notes
For a crunchier texture, add chopped peanuts or crushed pretzels to the peanut butter layer.
Substitute the Oreos with chocolate graham crackers for a different flavor profile.