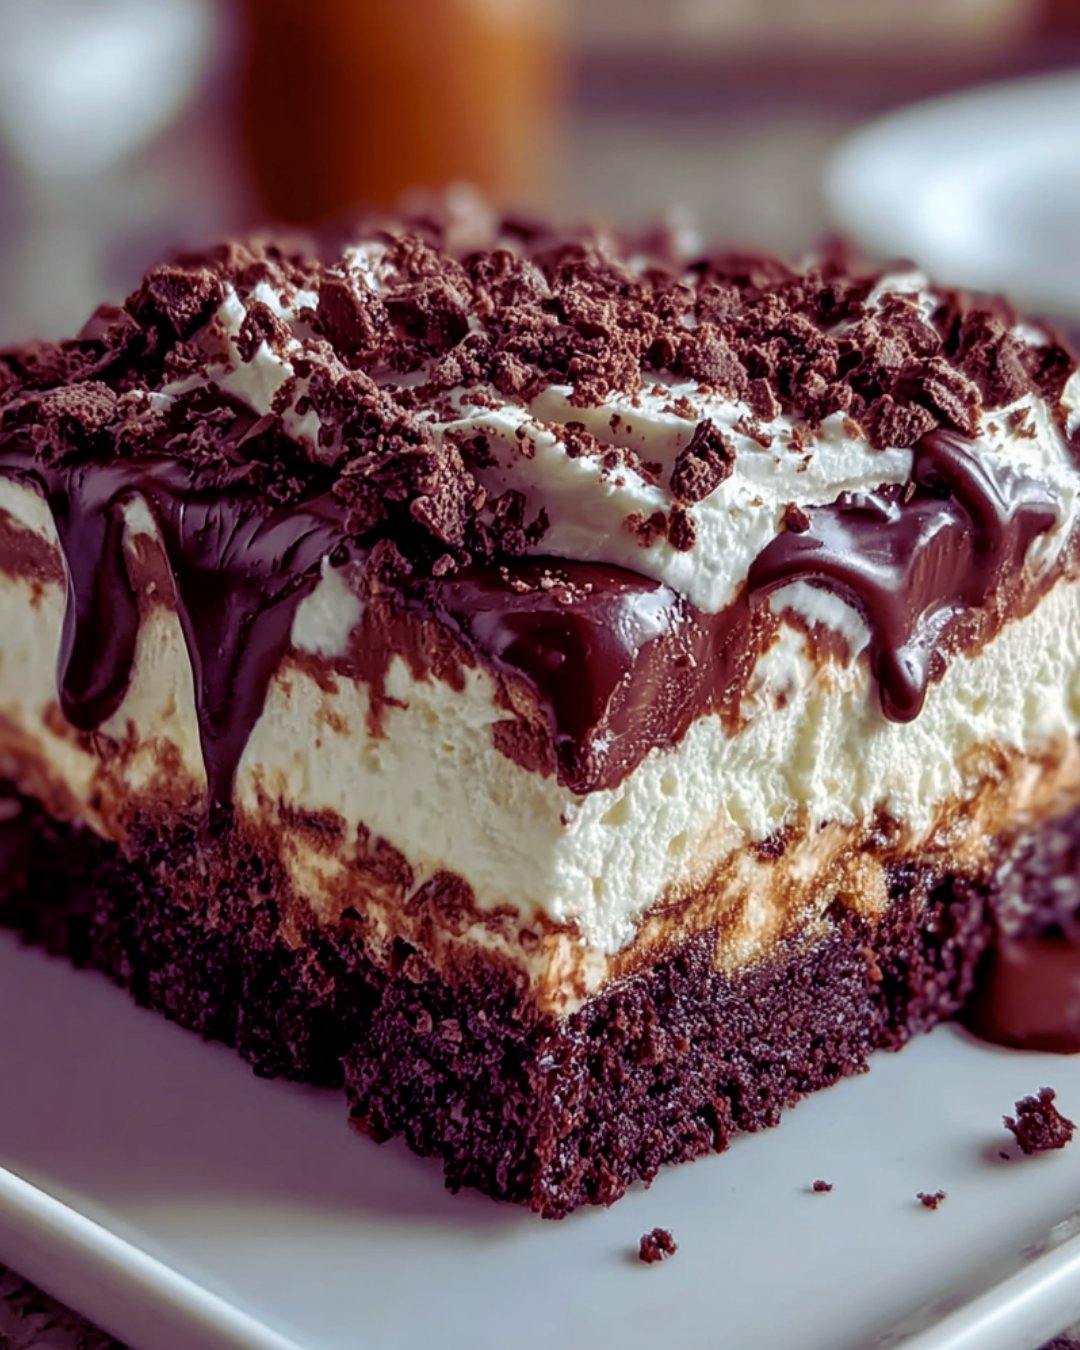
There’s something magical about desserts that come together without the fuss of baking. The Brownie Refrigerator Cake is a delightful no-bake treat that captures that magic perfectly. Whether you’re juggling a busy schedule or just want to impress your friends at a gathering, this dessert is your go-to solution. Layers of rich brownie, creamy chocolate pudding, and fluffy whipped topping create a symphony of flavors and textures. Plus, it’s a breeze to make! Trust me, once you serve this, you’ll be the hero of the dessert table.
Why You’ll Love This Brownie Refrigerator Cake
This Brownie Refrigerator Cake is a game-changer for dessert lovers. It’s incredibly easy to whip up, making it perfect for those hectic weeknights or last-minute gatherings. The layers of chocolatey goodness are not just a feast for the eyes; they’re a treat for the taste buds too! Plus, it requires no baking, so you can spend more time enjoying the company of friends and family instead of slaving away in the kitchen.
Ingredients for Brownie Refrigerator Cake
Gathering the right ingredients is the first step to creating this delightful Brownie Refrigerator Cake. Here’s what you’ll need:
Brownie mix: The star of the show! Choose your favorite brand for a rich base.
Whipped topping: This adds a light, fluffy texture. You can use store-bought or homemade if you’re feeling adventurous.
Chocolate pudding mix: Instant pudding works best for a quick setup. It brings a creamy layer that complements the brownies.
Milk: Essential for mixing the pudding. Any type will do, but whole milk gives a richer flavor.
Vanilla extract: A splash of this elevates the overall taste, adding warmth and depth.
Crushed chocolate sandwich cookies: These add a delightful crunch and extra chocolatey goodness. Feel free to use any brand you love.
Mini chocolate chips: Perfect for sprinkling between layers, they add bursts of chocolate in every bite.
Fresh berries (optional): A colorful garnish that adds a fresh touch and balances the sweetness.
For those looking to mix things up, consider adding a few drops of peppermint extract to the whipped topping for a minty twist. You can also swap the chocolate pudding for vanilla or butterscotch for a different flavor profile. The exact quantities for each ingredient are listed at the bottom of the article for easy printing.
How to Make Brownie Refrigerator Cake
Creating this Brownie Refrigerator Cake is a straightforward process that anyone can master. Follow these simple steps, and you’ll have a delicious dessert ready to impress!
Step 1: Prepare the Brownies
Start by preheating your oven according to the brownie mix package instructions. In a large bowl, combine the brownie mix with the required ingredients, usually eggs, water, and oil. Mix until smooth, then pour the batter into a greased 9×13 inch pan. Bake until a toothpick inserted in the center comes out clean. Once done, let the brownies cool completely. This step is crucial; warm brownies can melt the layers above!
Step 2: Make the Chocolate Pudding
While the brownies cool, it’s time to whip up the chocolate pudding. In a medium bowl, whisk together the chocolate pudding mix, milk, and vanilla extract. Stir until the mixture is smooth and free of lumps. Let it sit for about five minutes. This allows the pudding to thicken, creating a luscious layer in your cake.
Step 3: Layer the Ingredients
Once the brownies are cool, cut them into small squares. Begin layering by placing half of the brownie squares at the bottom of a clean 9×13 inch dish. Next, spread half of the chocolate pudding mixture over the brownies. Follow this with half of the whipped topping, smoothing it out evenly. Sprinkle half of the crushed chocolate sandwich cookies and mini chocolate chips on top. Repeat these layers with the remaining ingredients, finishing with a layer of whipped topping and a sprinkle of cookies and chips for that extra crunch.
Step 4: Refrigerate
Cover the dish tightly with plastic wrap. This step is essential to let the flavors meld together. Refrigerate for at least four hours, but overnight is best. The longer it sits, the better the flavors blend, and the texture becomes even creamier.
Step 5: Garnish and Serve
When you’re ready to serve, remove the cake from the fridge. If you want to add a pop of color, garnish with fresh berries on top. This not only looks beautiful but also adds a refreshing contrast to the rich chocolate layers. Slice into squares and enjoy the delightful layers of this Brownie Refrigerator Cake!
Tips for Success
Make sure your brownies are completely cool before layering to prevent melting.
Use a spatula to spread the pudding and whipped topping evenly for a polished look.
For a cleaner cut, use a sharp knife dipped in hot water when slicing the cake.
Feel free to customize layers with your favorite candies or nuts for added texture.
Don’t rush the refrigeration; letting it sit overnight enhances the flavors.
Equipment Needed
9×13 inch baking pan: Essential for baking the brownies. A glass or metal pan works well.
Mixing bowls: Use a large bowl for the brownie mix and a medium bowl for the pudding.
Whisk: Perfect for mixing the pudding. A fork can work in a pinch.
Spatula: Great for spreading layers evenly. A spoon can also do the job.
Plastic wrap: Necessary for covering the dish while it chills in the fridge.
Variations
Mint Chocolate: Add a few drops of peppermint extract to the whipped topping for a refreshing twist.
Fruit Fusion: Layer in fresh fruits like strawberries or bananas between the brownie and pudding layers for a fruity surprise.
Nutty Delight: Incorporate chopped nuts, such as walnuts or pecans, for added crunch and flavor.
Gluten-Free Option: Use a gluten-free brownie mix to make this dessert suitable for those with gluten sensitivities.
Vegan Version: Substitute the brownie mix with a vegan alternative and use coconut whipped cream instead of traditional whipped topping.
Serving Suggestions
Pair with a scoop of vanilla ice cream for a delightful contrast in temperature and texture.
Serve alongside a rich cup of coffee or a creamy latte to balance the sweetness.
For a festive touch, drizzle chocolate sauce over each slice before serving.
Present on a colorful platter, garnished with mint leaves for an elegant look.
FAQs about Brownie Refrigerator Cake
Curious about this delightful Brownie Refrigerator Cake? Here are some common questions that might pop into your mind:
Can I make this dessert ahead of time?
Absolutely! In fact, making it a day in advance allows the flavors to meld beautifully. Just keep it covered in the fridge until you’re ready to serve.
What can I substitute for the whipped topping?
If you’re looking for alternatives, homemade whipped cream works wonderfully. You can also use coconut whipped cream for a dairy-free option.
How long will the Brownie Refrigerator Cake last in the fridge?
This cake can last up to five days in the fridge, but I doubt it will stick around that long! Just make sure it’s covered well.
Can I use different flavors of pudding?
Definitely! Vanilla or butterscotch pudding can add a unique twist to your Brownie Refrigerator Cake. Feel free to experiment!
Is this dessert suitable for kids?
Yes! Kids love the layers and the chocolatey goodness. Just be mindful of any allergies, especially with the chocolate sandwich cookies.
Final Thoughts
Creating this Brownie Refrigerator Cake is more than just whipping up a dessert; it’s about sharing joy and deliciousness with those you love. Each layer tells a story, from the rich brownies to the creamy pudding, all topped with a sprinkle of fun. It’s a treat that brings smiles, whether at a family gathering or a casual weeknight dinner. Plus, the no-bake aspect means you can focus on what truly matters—enjoying time with friends and family. So, roll up your sleeves, dive into this delightful recipe, and let the sweet moments unfold!