There’s something magical about combining childhood favorites with a twist, and that’s exactly what Tasty Fruity Pebbles Sushi delivers. This vibrant dessert is not just a feast for the eyes; it’s a delightful way to bring a smile to anyone’s face. Whether you’re looking to impress your friends at a gathering or simply want to treat your family to something fun, this recipe is a quick solution for a busy day. With its colorful layers and fruity flavors, it’s bound to become a hit in your kitchen. Let’s dive into this playful culinary adventure!
Why You’ll Love This Tasty Fruity Pebbles Sushi
This Tasty Fruity Pebbles Sushi is a game-changer for dessert lovers. It’s incredibly easy to whip up, making it perfect for those busy weeknights or spontaneous gatherings. The vibrant colors and fruity flavors create a visual feast that’s as delightful to eat as it is to look at. Plus, it’s a fun way to get the kids involved in the kitchen, turning dessert into a family activity!
Ingredients for Tasty Fruity Pebbles Sushi
Gathering the right ingredients is the first step to creating your Tasty Fruity Pebbles Sushi. Here’s what you’ll need:
Sushi rice: This sticky rice is the base of your sushi, providing that classic texture.
Water: Essential for cooking the rice to perfection.
Sugar: Adds a touch of sweetness to balance the flavors.
Rice vinegar: Gives the rice a tangy kick, enhancing its taste.
Salt: Just a pinch to elevate the overall flavor of the rice.
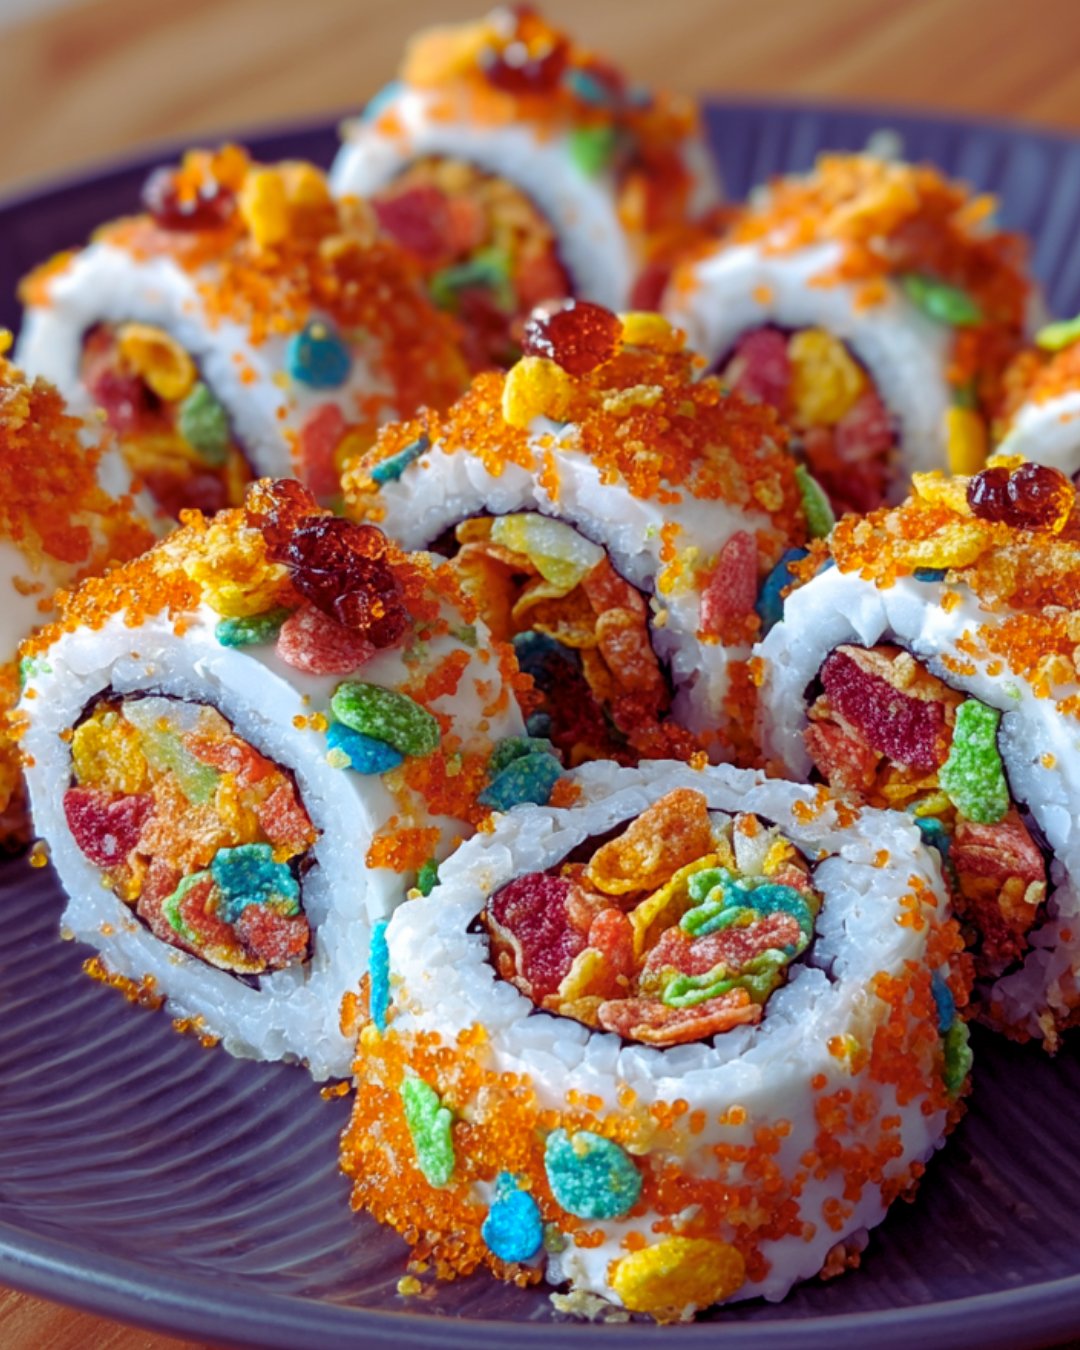
Fruity Pebbles cereal: The star of the show! These colorful, fruity bits add crunch and fun.
Sliced strawberries: Fresh and juicy, they bring a burst of flavor.
Sliced bananas: Sweet and creamy, they complement the other fruits beautifully.
Sliced kiwi: Adds a zesty twist and vibrant color.
Nori (seaweed): This wraps everything together, giving your sushi that authentic touch.
Melted white chocolate (optional): A sweet drizzle for those who want an extra indulgent treat.
Feel free to get creative! You can swap in different fruits like mango or blueberries for a unique twist. For a lighter option, consider a sprinkle of powdered sugar instead of the chocolate drizzle. Exact quantities for each ingredient are available at the bottom of the article for easy printing.
How to Make Tasty Fruity Pebbles Sushi
Creating Tasty Fruity Pebbles Sushi is a fun and straightforward process. Follow these steps, and you’ll have a colorful dessert that’s sure to impress!
Step 1: Prepare the Sushi Rice
Start by rinsing the sushi rice under cold water. This removes excess starch, ensuring your rice is sticky but not gummy. Combine the rinsed rice and water in a medium saucepan. Bring it to a boil, then reduce the heat to low. Cover and let it simmer for 18-20 minutes. Once the rice is tender and the water is absorbed, remove it from heat. Let it sit, covered, for 10 minutes. This resting time is crucial for perfect texture!
Step 2: Season the Rice
In a small bowl, mix together sugar, rice vinegar, and salt until dissolved. This mixture adds a delightful tang to the rice. Once the rice has cooled to room temperature, gently fold in the seasoning. Be careful not to mash the rice; you want to keep those lovely grains intact. This step is where the magic happens, transforming plain rice into something special!
Step 3: Assemble the Sushi
Lay a sheet of nori on a bamboo sushi mat or a clean surface. Wet your hands to prevent sticking, then spread about 1 cup of sushi rice evenly over the nori. Leave a 1-inch border at the top. This is where the fun begins! Sprinkle a generous amount of Fruity Pebbles over the rice. Then, layer your sliced strawberries, bananas, and kiwi in a line across the center. The colors will pop, making your sushi visually stunning!
Step 4: Roll the Sushi
Starting from the bottom, carefully roll the sushi away from you. Use the mat to help shape it tightly. Roll until you reach the nori border. To seal the roll, wet the edge with a little water. This step is key to keeping everything together. Don’t worry if it’s not perfect; it’s all about having fun!
Step 5: Slice and Serve
Using a sharp knife, slice the roll into 6-8 pieces. Wipe the knife with a damp cloth between cuts for cleaner slices. This will help maintain the beautiful layers of fruit and rice. Arrange the pieces on a plate, and get ready to enjoy your creation!
Step 6: Optional Chocolate Drizzle
If you want to take your Tasty Fruity Pebbles Sushi to the next level, drizzle some melted white chocolate over the top. This adds a sweet touch and makes it even more indulgent. Just melt the chocolate in the microwave and use a spoon to drizzle it over your sushi. It’s a delightful finishing touch!
Tips for Success
Always rinse your sushi rice thoroughly to achieve the right texture.
Let the rice cool completely before assembling to prevent sogginess.
Use a sharp knife for clean cuts; it makes a big difference in presentation.
Experiment with different fruits to find your favorite combinations.
Keep a bowl of water nearby to wet your hands and the nori for easy handling.
Equipment Needed
Bamboo sushi mat: Ideal for rolling, but a clean kitchen towel works too.
Medium saucepan: For cooking the rice; any pot with a lid will do.
Sharp knife: Essential for slicing; a serrated knife can also work.
Small bowl: For mixing the seasoning; any bowl will suffice.
Variations
Mango Madness: Swap out the strawberries for ripe mango slices for a tropical twist.
Berry Blast: Use a mix of blueberries and raspberries instead of the kiwi for a berry explosion.
Nutty Crunch: Add a sprinkle of chopped nuts like almonds or pistachios for extra texture.
Vegan Delight: Replace white chocolate with a drizzle of agave syrup for a vegan-friendly option.
Chocolate Lovers: Incorporate mini chocolate chips into the rice for a sweet surprise.
Serving Suggestions
Pair your Tasty Fruity Pebbles Sushi with a scoop of vanilla ice cream for a delightful contrast.
Serve with a side of whipped cream for dipping; it adds a creamy touch.
For drinks, consider a refreshing fruit punch or iced tea.
Present on a colorful platter to enhance the visual appeal.
FAQs about Tasty Fruity Pebbles Sushi
Can I use regular rice instead of sushi rice?
While sushi rice is ideal for its sticky texture, you can use regular short-grain rice in a pinch. Just keep in mind that the texture may differ slightly.
How long does Tasty Fruity Pebbles Sushi last?
This colorful dessert is best enjoyed fresh. However, you can store leftovers in an airtight container in the fridge for up to two days. The Fruity Pebbles may lose some crunch, but it will still taste great!
Can I make this recipe gluten-free?
Yes! Just ensure that the nori and any additional ingredients, like chocolate, are gluten-free. Most nori is naturally gluten-free, making this a fun option for everyone.
What other fruits can I add to my sushi?
The possibilities are endless! Try adding mango, pineapple, or even peaches for a tropical twist. Just make sure to slice them thinly for easy rolling.
Is Tasty Fruity Pebbles Sushi suitable for kids?
Absolutely! This dessert is a hit with kids. It’s colorful, fun to make, and a great way to get them involved in the kitchen. Just watch out for any allergies to the fruits you choose!
Final Thoughts
Creating Tasty Fruity Pebbles Sushi is more than just making a dessert; it’s about crafting joyful moments in the kitchen. The vibrant colors and playful flavors bring a sense of nostalgia, reminding us of carefree childhood days. Each bite is a delightful explosion of fruity goodness, making it perfect for gatherings or a fun family night. Plus, it’s a fantastic way to get everyone involved, from rolling to decorating. So, roll up your sleeves, gather your loved ones, and dive into this colorful culinary adventure. You’ll not only satisfy your sweet tooth but also create lasting memories!
A fun and colorful dessert recipe that combines sushi rice with fruity flavors and vibrant Fruity Pebbles cereal.
Ingredients
Scale
2 cups sushi rice
2 1/2 cups water
1/4 cup sugar
1/4 cup rice vinegar
1/2 teaspoon salt
1 cup Fruity Pebbles cereal
1/2 cup sliced strawberries
1/2 cup sliced bananas
1/2 cup sliced kiwi
4 sheets of nori (seaweed)
1/4 cup melted white chocolate (optional)
Instructions
Rinse the sushi rice under cold water until the water runs clear. Combine the rinsed rice and water in a medium saucepan and bring to a boil. Once boiling, reduce the heat to low, cover, and simmer for 18-20 minutes until the rice is tender and the water is absorbed. Remove from heat and let it sit, covered, for 10 minutes.
In a small bowl, mix the sugar, rice vinegar, and salt until dissolved. Gently fold this mixture into the cooked rice, ensuring the rice is evenly coated. Allow the rice to cool to room temperature.
Once the rice is cool, lay a sheet of nori on a bamboo sushi mat or a clean surface. Wet your hands to prevent sticking and spread a thin layer of sushi rice (about 1 cup) evenly over the nori, leaving a 1-inch border at the top.
Sprinkle a generous amount of Fruity Pebbles over the rice, then layer the sliced strawberries, bananas, and kiwi in a line across the center of the rice.
Starting from the bottom, carefully roll the sushi away from you, using the mat to help shape it tightly. Roll until you reach the border of the nori, then wet the edge with a little water to seal the roll.
Use a sharp knife to slice the roll into 6-8 pieces. Wipe the knife with a damp cloth between cuts for cleaner slices.
If desired, drizzle melted white chocolate over the sushi for added sweetness and decoration.
Notes
For a fun twist, try adding different fruits like mango or blueberries.
Substitute the white chocolate drizzle with a sprinkle of powdered sugar for a lighter option.