There’s something magical about desserts that combine two favorites into one delightful treat. Loaded Brownie Cheesecake Cups do just that, bringing together the rich, fudgy goodness of brownies and the creamy decadence of cheesecake. Whether you’re looking to impress guests or simply satisfy a sweet tooth after a long day, these little cups are the perfect solution. They’re quick to whip up and even easier to devour. Trust me, once you take a bite, you’ll understand why these Loaded Brownie Cheesecake Cups are destined to become a staple in your dessert repertoire.
Why You’ll Love This Loaded Brownie Cheesecake Cups
These Loaded Brownie Cheesecake Cups are a game-changer for any dessert lover. They’re incredibly easy to make, taking just 40 minutes from start to finish. The combination of rich brownie and creamy cheesecake creates a flavor explosion that will leave your taste buds dancing. Plus, they’re perfect for sharing at gatherings or enjoying solo on a cozy night in. Who wouldn’t love a dessert that’s both indulgent and simple?
Ingredients for Loaded Brownie Cheesecake Cups
Gathering the right ingredients is the first step to creating these delightful Loaded Brownie Cheesecake Cups. Here’s what you’ll need:
Brownie mix: The star of the show! Choose your favorite brand for a rich base.
Vegetable oil: This adds moisture to the brownies, ensuring they’re fudgy and delicious.
Egg: A large egg helps bind the brownie mix together, giving it structure.
Water: Just a splash to help combine the brownie mix smoothly.
Cream cheese: Softened cream cheese is essential for that creamy cheesecake layer.
Granulated sugar: Sweetens the cheesecake and balances the flavors perfectly.
Vanilla extract: A splash of vanilla adds depth and enhances the overall taste.
Mini chocolate chips: These little gems add bursts of chocolatey goodness throughout.
Crushed Oreos (optional): For an extra crunch and flavor, fold in some crushed Oreos.
Whipped cream (optional): A dollop on top makes for a beautiful presentation.
Chocolate syrup (optional): Drizzle it on for an indulgent finish that’s hard to resist.
For exact measurements, check the bottom of the article where you can find everything listed for easy printing. Happy baking!
How to Make Loaded Brownie Cheesecake Cups
Creating these Loaded Brownie Cheesecake Cups is a breeze! Follow these simple steps, and you’ll have a dessert that’s sure to impress. Let’s dive in!
Step 1: Preheat the Oven
First things first, preheat your oven to 350°F (175°C). This ensures that your Loaded Brownie Cheesecake Cups bake evenly. While the oven warms up, line a muffin tin with cupcake liners. This makes for easy removal and cleanup!
Step 2: Prepare the Brownie Batter
In a medium bowl, combine the brownie mix, vegetable oil, egg, and water. Stir until everything is well mixed. You want a smooth batter that’s ready to become the base of your delicious cups. The smell of chocolate will start to fill your kitchen, and trust me, it’s just the beginning!
Step 3: Layer the Brownie Base
Spoon about 1 tablespoon of the brownie batter into the bottom of each cupcake liner. Make sure to spread it evenly. This layer is the foundation of your Loaded Brownie Cheesecake Cups, so don’t skimp on the chocolate goodness!
Step 4: Make the Cheesecake Filling
In another bowl, beat the softened cream cheese with granulated sugar and vanilla extract until smooth. This is where the magic happens! The creamy texture will complement the brownie base perfectly. You’ll want to taste it, but save some for the cups!
Step 5: Add the Egg
Add the egg to the cream cheese mixture and beat until fully incorporated. This step is crucial for achieving that rich, creamy cheesecake layer. It’s like adding a secret ingredient that takes your dessert to the next level!
Step 6: Fold in Chocolate Chips
Now, fold in the mini chocolate chips and crushed Oreos, if you’re using them. This adds delightful bursts of flavor and texture. Each bite will be a surprise, and who doesn’t love a little extra chocolate?
Step 7: Assemble the Cups
Spoon the cheesecake mixture over the brownie layer in each cupcake liner, filling them about 3/4 full. Don’t worry if it looks a bit messy; that’s part of the charm! The layers will meld together beautifully as they bake.
Step 8: Bake
Place the muffin tin in the preheated oven and bake for 20-25 minutes. You’ll know they’re done when the cheesecake is set and the edges are lightly golden. The aroma wafting through your kitchen will be irresistible!
Step 9: Cool Down
Once baked, allow the cups to cool in the pan for 10 minutes. Then, transfer them to a wire rack to cool completely. Patience is key here; letting them cool properly ensures the perfect texture.
Step 10: Add Toppings
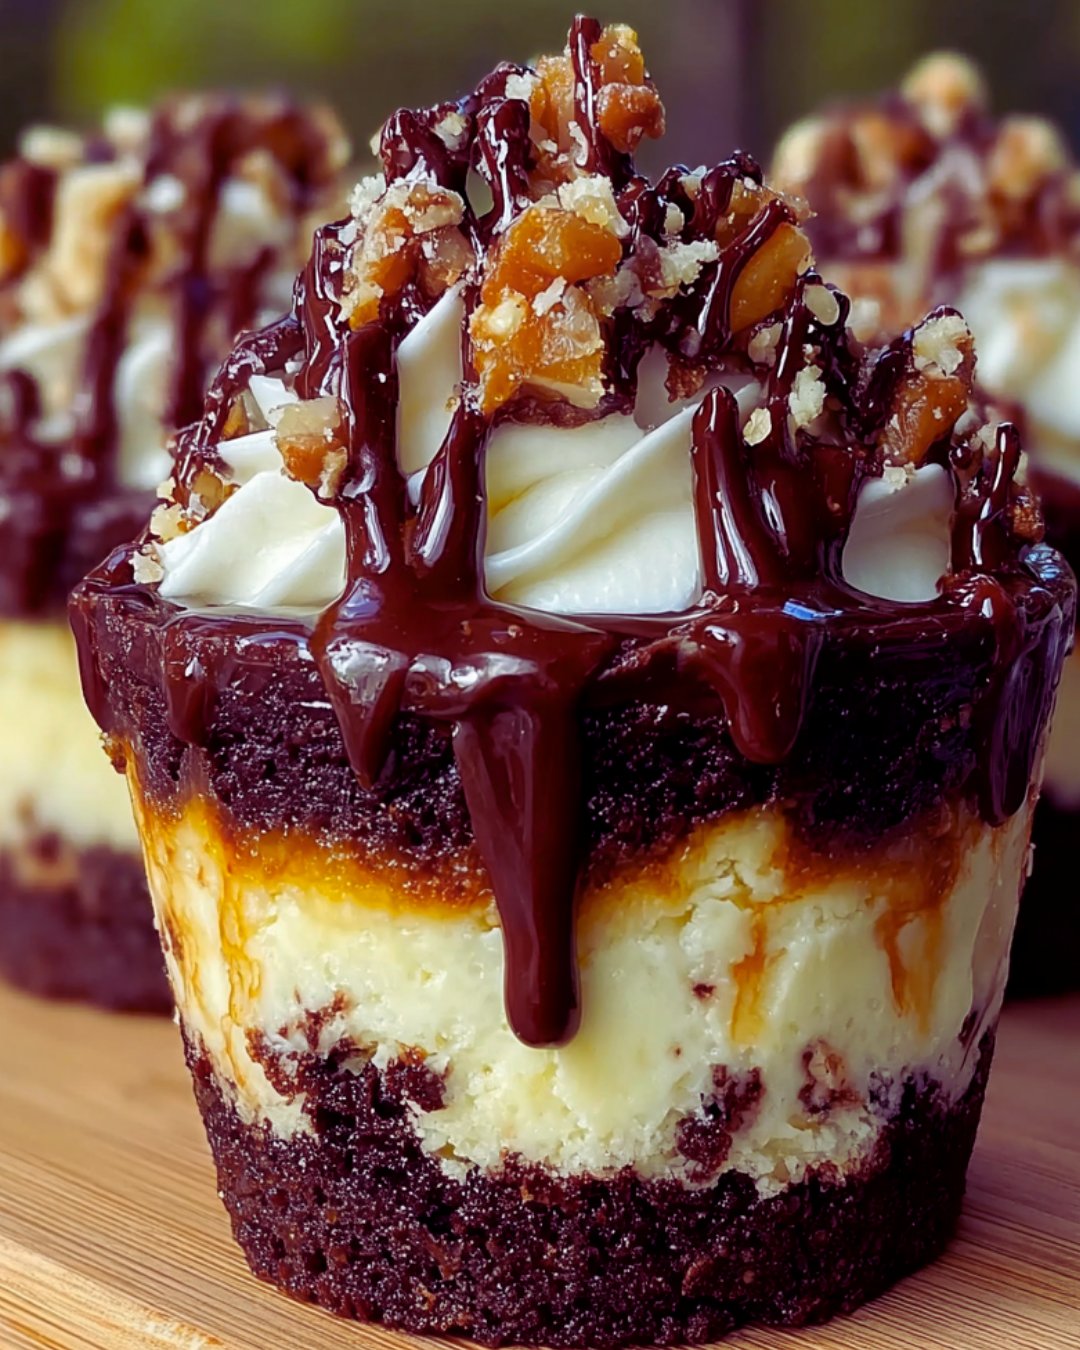
Finally, once cooled, top with whipped cream and drizzle with chocolate syrup if desired. This is where you can get creative! A sprinkle of crushed Oreos or a few extra chocolate chips on top can make these cups even more tempting.
Tips for Success
Use room temperature cream cheese for a smoother filling.
Don’t overmix the cheesecake batter; it should be just combined.
Check for doneness by gently shaking the muffin tin; the centers should be slightly jiggly.
Let the cups cool completely before adding toppings for the best presentation.
Experiment with different toppings like nuts or fruit for a unique twist!
Equipment Needed
Muffin tin: Essential for baking the cups; a silicone muffin pan works great for easy removal.
Cupcake liners: Use paper or silicone liners to keep the cups intact.
Mixing bowls: A medium bowl for the brownie batter and a larger one for the cheesecake filling.
Electric mixer: Handy for beating the cream cheese, but a whisk works too!
Variations
Gluten-Free: Substitute the brownie mix with a gluten-free version to accommodate dietary needs.
Nutty Delight: Add chopped walnuts or pecans to the brownie layer for a crunchy texture.
Peanut Butter Swirl: Mix in some peanut butter into the cheesecake filling for a rich, nutty flavor.
Fruit Infusion: Top with fresh berries or a fruit compote for a refreshing twist.
Vegan Option: Use a vegan brownie mix and substitute cream cheese with a plant-based alternative.
Serving Suggestions
Pair with a scoop of vanilla ice cream for a delightful contrast in temperature.
Serve alongside fresh berries for a pop of color and freshness.
Drizzle with caramel sauce for an extra layer of sweetness.
Enjoy with a cup of coffee or a glass of milk to balance the richness.
Present on a decorative platter for an eye-catching dessert display.
FAQs about Loaded Brownie Cheesecake Cups
Curious about these Loaded Brownie Cheesecake Cups? Here are some common questions I often hear, along with answers to help you on your baking journey!
Can I make these Loaded Brownie Cheesecake Cups ahead of time?
Absolutely! You can prepare them a day in advance. Just store them in the refrigerator after they cool completely. This allows the flavors to meld beautifully!
What can I substitute for cream cheese?
If you’re looking for a lighter option, try Greek yogurt or a dairy-free cream cheese alternative. Both will give you a creamy texture without compromising flavor.
How do I know when the cheesecake is done baking?
Check for doneness by gently shaking the muffin tin. The centers should be slightly jiggly but not liquid. They will firm up as they cool!
Can I freeze Loaded Brownie Cheesecake Cups?
Yes, you can! Just wrap them tightly in plastic wrap and store them in an airtight container. They’ll keep well for up to three months. Thaw in the fridge before serving.
What toppings work best with these cups?
Get creative! Whipped cream, chocolate syrup, crushed Oreos, or even fresh fruit can elevate your Loaded Brownie Cheesecake Cups. The options are endless!
Final Thoughts
Creating Loaded Brownie Cheesecake Cups is more than just baking; it’s about crafting a moment of joy. Each bite offers a delightful blend of textures and flavors that can brighten any day. Whether you’re sharing them with friends or indulging solo, these little cups are sure to bring smiles. They’re perfect for celebrations or just a sweet treat after a long week. Plus, the ease of preparation means you can whip them up anytime the craving strikes. So, roll up your sleeves and dive into this delicious adventure—you won’t regret it!