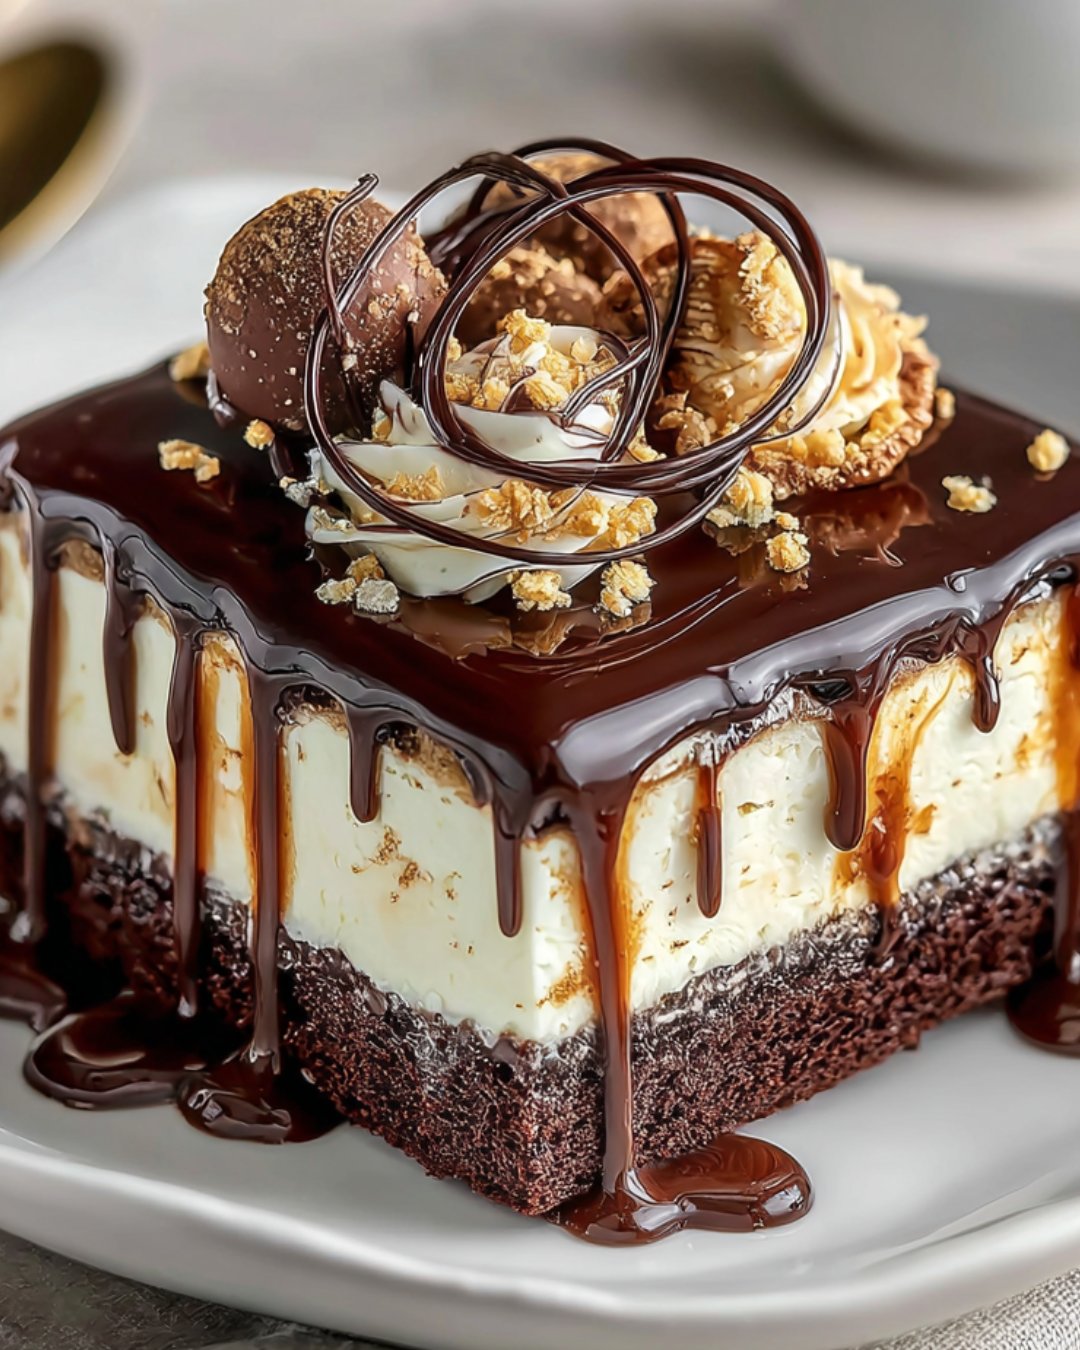
There’s something magical about a dessert that can turn an ordinary day into a celebration. The Tuxedo Bar Cake is just that—a rich, indulgent treat that brings joy to any occasion. Whether you’re looking to impress guests or simply satisfy a sweet tooth, this cake is your go-to solution. With layers of chocolate cake, creamy frosting, and a luscious ganache, it’s a dessert that speaks to the heart. Plus, it’s surprisingly easy to whip up, making it perfect for busy weeknights or special gatherings. Trust me, once you try it, you’ll be hooked!
Why You’ll Love This Tuxedo Bar Cake
This Tuxedo Bar Cake is a dream come true for any chocolate lover. It’s not just about the taste; it’s about the ease of making it. With simple ingredients and straightforward steps, you can create a show-stopping dessert in no time. The rich layers and creamy frosting will have everyone asking for seconds. Plus, it’s a fantastic way to impress friends and family without spending hours in the kitchen!
Ingredients for Tuxedo Bar Cake
Gathering the right ingredients is the first step to creating your Tuxedo Bar Cake masterpiece. Here’s what you’ll need:
All-purpose flour: The backbone of your cake, providing structure and texture.
Granulated sugar: Sweetens the cake and helps create a moist crumb.
Unsweetened cocoa powder: Adds rich chocolate flavor without extra sweetness.
Baking powder: A leavening agent that helps the cake rise beautifully.
Baking soda: Works with the baking powder to ensure a light, fluffy cake.
Salt: Enhances the flavors and balances the sweetness.
Unsalted butter: Adds richness and moisture; make sure it’s softened for easy mixing.
Large eggs: Bind the ingredients together and contribute to the cake’s structure.
Vanilla extract: A must-have for that warm, inviting flavor.
Buttermilk: Keeps the cake moist and adds a slight tang.
Semi-sweet chocolate chips: For pockets of melty chocolate goodness throughout the cake.
Heavy whipping cream: Essential for making the luscious frosting.
Cream cheese: Provides a creamy, tangy base for the frosting.
Powdered sugar: Sweetens the frosting and gives it a smooth texture.
Unsweetened cocoa powder (for frosting): Deepens the chocolate flavor in the frosting.
Chocolate chips (for ganache): The star of the show, creating a rich topping.
Heavy cream (for ganache): Helps melt the chocolate into a silky sauce.
For those looking to switch things up, consider adding a teaspoon of espresso powder to the batter for an extra depth of flavor. You can also experiment with dark or white chocolate chips instead of semi-sweet for a unique twist. Exact measurements for these ingredients can be found at the bottom of the article, ready for printing!
How to Make Tuxedo Bar Cake
Step 1: Preheat and Prepare
Start by preheating your oven to 350°F (175°C). While it warms up, grab a 9×13 inch baking pan and grease it with butter or cooking spray. Then, dust it with flour to ensure your cake slides out easily after baking. This step is crucial for a perfect finish!
Step 2: Mix Dry Ingredients
In a large mixing bowl, whisk together the all-purpose flour, granulated sugar, unsweetened cocoa powder, baking powder, baking soda, and salt. This blend creates the foundation of your Tuxedo Bar Cake. Make sure there are no lumps; a smooth mix leads to a fluffy cake!
Step 3: Combine Wet Ingredients
Now, it’s time to add the wet ingredients. Toss in the softened unsalted butter, large eggs, vanilla extract, and buttermilk into the dry mix. Beat everything together with an electric mixer on medium speed for about two minutes. This will create a rich, velvety batter that’s simply irresistible.
Step 4: Add Chocolate Chips
Stir in the semi-sweet chocolate chips. These little gems will melt into the cake, creating pockets of chocolatey goodness. Trust me, you’ll want every bite to be a chocolate explosion!
Step 5: Bake the Cake
Pour the batter into your prepared baking pan, spreading it evenly. Slide it into the preheated oven and bake for 30-35 minutes. To check for doneness, insert a toothpick in the center; it should come out clean. The aroma will be heavenly!
Step 6: Cool the Cake
Once baked, let the cake cool in the pan for about 10 minutes. Then, transfer it to a wire rack to cool completely. This step is essential; frosting a warm cake can lead to a melty mess!
Step 7: Prepare the Frosting
While the cake cools, let’s whip up the frosting. In a bowl, beat the heavy whipping cream until stiff peaks form. In another bowl, beat the softened cream cheese until smooth. Gradually add powdered sugar and vanilla extract, mixing until well combined. This frosting is creamy and dreamy!
Step 8: Frost the Cake
Once the cake is completely cool, spread the cream cheese frosting evenly over the top. Use a spatula to create a smooth finish. This layer of frosting is where the magic begins!
Step 9: Make the Ganache
For the ganache, heat the heavy cream in a small saucepan over medium heat until it simmers. Remove it from the heat and add the semi-sweet chocolate chips. Stir until melted and smooth. This rich topping will take your cake to the next level!
Step 10: Chill and Serve
Drizzle the ganache over the frosted cake, allowing it to cascade down the sides. Chill the cake in the refrigerator for at least 30 minutes to set the ganache. Once set, slice and serve this indulgent treat to your eager guests!
Tips for Success
Use room temperature ingredients for better mixing and a smoother batter.
Don’t overmix the batter; mix just until combined for a light cake.
Let the cake cool completely before frosting to avoid melting.
For a cleaner cut, use a hot knife to slice the cake.
Store leftovers in the fridge to keep the ganache fresh and delicious.
Equipment Needed
9×13 inch baking pan: Essential for baking the cake; a round pan works too.
Mixing bowls: Use at least two for mixing dry and wet ingredients.
Electric mixer: A hand mixer is perfect for whipping cream and batter.
Spatula: Great for spreading frosting evenly over the cake.
Wire rack: Ideal for cooling the cake; a plate can substitute in a pinch.
Variations
Gluten-Free: Substitute all-purpose flour with a gluten-free blend to make this cake suitable for gluten-sensitive friends.
Vegan: Replace eggs with flax eggs and use plant-based butter and non-dairy milk for a delicious vegan version.
Nutty Twist: Add chopped walnuts or pecans to the batter for a delightful crunch and extra flavor.
Mint Chocolate: Incorporate a few drops of peppermint extract into the batter for a refreshing minty flavor.
Fruit Layer: Add a layer of fresh raspberries or strawberries between the cake and frosting for a fruity surprise.
Serving Suggestions
Pair with Coffee: A rich cup of coffee complements the chocolate flavors beautifully.
Fresh Berries: Serve with a side of fresh raspberries or strawberries for a refreshing contrast.
Ice Cream: A scoop of vanilla or mint chocolate chip ice cream adds a delightful creaminess.
Presentation: Garnish with chocolate shavings or a dusting of cocoa powder for an elegant touch.
FAQs about Tuxedo Bar Cake
Can I make Tuxedo Bar Cake ahead of time?
Absolutely! This cake actually tastes better after a day in the fridge. Just make sure to store it in an airtight container to keep it fresh.
What can I substitute for buttermilk?
If you don’t have buttermilk on hand, mix one cup of milk with a tablespoon of vinegar or lemon juice. Let it sit for about 5 minutes, and you’ll have a perfect buttermilk substitute!
How do I store leftovers?
Store any leftover Tuxedo Bar Cake in the refrigerator. It will stay fresh for up to five days. Just cover it well to prevent it from drying out.
Can I freeze Tuxedo Bar Cake?
Yes, you can freeze this cake! Wrap it tightly in plastic wrap and then in aluminum foil. It can be frozen for up to three months. Just thaw it in the fridge before serving.
What’s the best way to cut the cake?
For clean slices, use a hot knife. Just run the knife under hot water, wipe it dry, and then cut. This will help you achieve those perfect, clean edges!
Final Thoughts
Creating a Tuxedo Bar Cake is more than just baking; it’s about crafting a moment of joy. Each layer tells a story, from the rich chocolate cake to the creamy frosting and decadent ganache. This dessert has a way of bringing people together, whether it’s a family gathering or a casual get-together with friends. The smiles and satisfied sighs that follow each bite are truly priceless. So, roll up your sleeves, embrace the process, and let this indulgent treat become a cherished part of your culinary repertoire. Trust me, it’s a journey worth taking!