There’s something magical about desserts that come together effortlessly, isn’t there? Cookie Butter Cheesecake Cups are just that—an easy, no-bake treat that combines the rich, warm flavors of cookie butter with the creamy goodness of cheesecake. Perfect for those busy weeknights or when you want to impress friends at a gathering, these little cups are a delightful way to satisfy your sweet tooth. Plus, they’re a breeze to whip up, making them an ideal choice for anyone looking to indulge without spending hours in the kitchen. Let’s dive into this delicious adventure!
Why You’ll Love This Cookie Butter Cheesecake Cups
These Cookie Butter Cheesecake Cups are a game-changer for dessert lovers. They’re incredibly easy to make, requiring no baking at all. In just 20 minutes of prep, you can create a dessert that tastes like it came from a fancy bakery. The combination of creamy cheesecake and the unique flavor of cookie butter is simply irresistible. Plus, they’re perfect for sharing—or keeping all to yourself!
Ingredients for Cookie Butter Cheesecake Cups
Gathering the right ingredients is the first step to creating these delightful Cookie Butter Cheesecake Cups. Here’s what you’ll need:
Cream Cheese: The base of your cheesecake filling, it adds that rich, creamy texture.
Granulated Sugar: Sweetens the mixture, balancing the flavors perfectly.
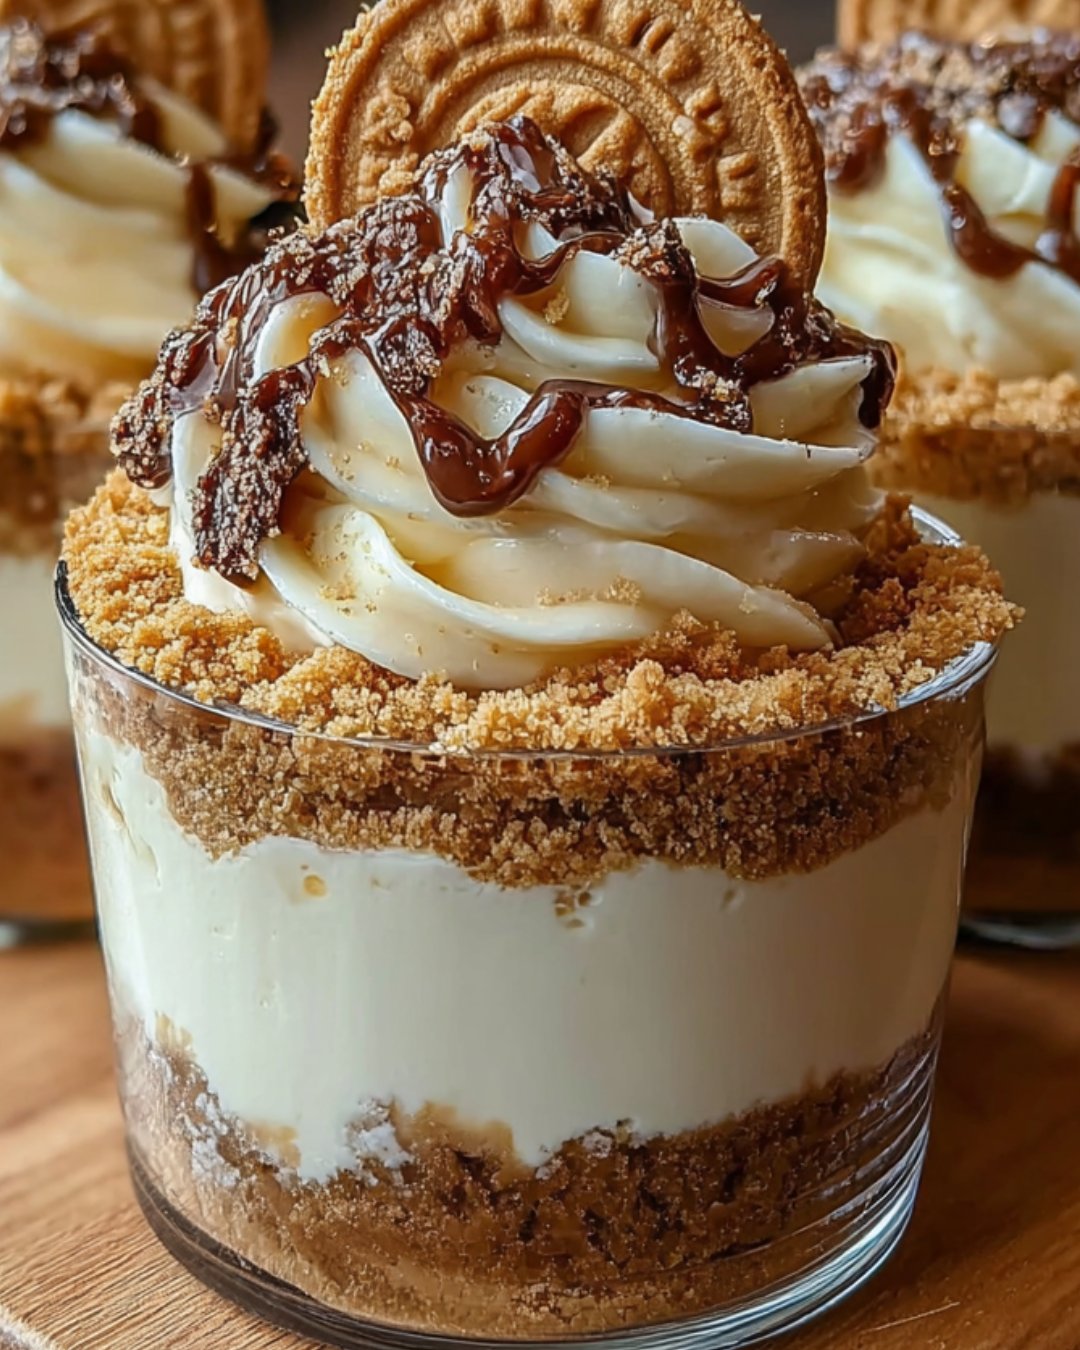
Cookie Butter: This is the star of the show! It brings a unique, spiced flavor that’s hard to resist.
Vanilla Extract: A splash of vanilla enhances the overall taste, making it even more delicious.
Heavy Whipping Cream: Whipped to perfection, it adds lightness and fluffiness to the cheesecake.
Powdered Sugar: This helps sweeten the whipped cream while keeping it smooth and airy.
Ground Cinnamon: A hint of spice that complements the cookie butter beautifully.
Mini Graham Cracker Crusts: These serve as the perfect base for your cheesecake cups, adding a crunchy texture.
Extra Cookie Butter (optional): Drizzle it on top for an extra indulgent touch.
Crushed Cookies (optional): Use them as a topping for added crunch and visual appeal.
For exact measurements, check the bottom of the article where you can find everything listed for easy printing. Feel free to get creative with your ingredients—substituting chocolate cookie butter or using chocolate crusts can add a fun twist!
How to Make Cookie Butter Cheesecake Cups
Creating these Cookie Butter Cheesecake Cups is a delightful journey that’s as easy as pie—well, easier! Follow these simple steps, and you’ll have a dessert that’s sure to impress.
Step 1: Prepare the Cream Cheese Mixture
Start by grabbing a large mixing bowl. Beat the softened cream cheese and granulated sugar together until the mixture is smooth and creamy. This step is crucial; you want to ensure there are no lumps. A hand mixer works wonders here, making the process quick and easy.
Step 2: Add Cookie Butter and Vanilla
Next, it’s time to bring in the star of the show—cookie butter! Add it to your cream cheese mixture along with the vanilla extract. Beat everything together until it’s fully combined and smooth. The aroma will be heavenly, and you might find yourself sneaking a taste!
Step 3: Whip the Heavy Cream
In a separate bowl, whip the heavy cream until soft peaks form. This means the cream should hold its shape but still be a bit soft. Gradually add the powdered sugar and ground cinnamon while continuing to whip. Keep going until you achieve stiff peaks. This will give your cheesecake cups that light, airy texture.
Step 4: Fold in the Whipped Cream
Now comes the fun part! Gently fold the whipped cream into the cookie butter mixture. Use a spatula and be careful not to deflate the whipped cream. This step is key to keeping your cheesecake cups light and fluffy. You want to see those beautiful swirls of cream throughout!
Step 5: Fill the Mini Crusts
Grab your mini graham cracker crusts and either spoon or pipe the cheesecake filling into each one. Fill them generously, right to the top. If you’re feeling fancy, a piping bag can make this step look extra professional. Just remember, the more filling, the better!
Step 6: Chill and Set
Finally, it’s time to let these beauties chill. Place the filled cups in the refrigerator for at least 2 hours. This allows the cheesecake to set properly, making each bite a creamy dream. Patience is key here, but trust me, it’s worth the wait!
Tips for Success
Make sure your cream cheese is at room temperature for easy mixing.
Use a hand mixer for a smooth and creamy filling.
Don’t overwhip the heavy cream; stop when stiff peaks form.
Chill the cheesecake cups longer for a firmer texture.
Experiment with different cookie butters for unique flavors.
Equipment Needed
Mixing Bowls: A large bowl for mixing and a medium bowl for whipping cream.
Hand Mixer: Ideal for smooth blending; a whisk works too, but it’ll take longer.
Spatula: Perfect for folding in the whipped cream gently.
Piping Bag (optional): For a professional touch when filling crusts.
Variations
Chocolate Cookie Butter: Swap regular cookie butter for chocolate cookie butter for a rich, decadent twist.
Nut-Free Option: Use sunflower seed butter instead of cookie butter for a nut-free alternative that still packs flavor.
Vegan Version: Substitute cream cheese with vegan cream cheese and use coconut cream in place of heavy whipping cream.
Fruit Topping: Add fresh berries or sliced bananas on top for a fruity contrast to the creamy cheesecake.
Spiced Variation: Incorporate a pinch of nutmeg or ginger for an extra layer of warmth and spice.
Serving Suggestions
Pair with a hot cup of coffee or a chilled glass of milk for a delightful contrast.
Garnish with a sprinkle of cinnamon or a drizzle of chocolate sauce for added flair.
Serve alongside fresh fruit like strawberries or raspberries for a refreshing touch.
Present on a decorative platter for a stunning dessert display at gatherings.
FAQs about Cookie Butter Cheesecake Cups
Curious about these delightful Cookie Butter Cheesecake Cups? Here are some common questions I often hear, along with answers to help you on your dessert-making journey.
Can I make these cheesecake cups ahead of time?
Absolutely! These cups can be made a day in advance. Just keep them covered in the fridge until you’re ready to serve. They actually taste even better after chilling overnight!
What can I use instead of cookie butter?
If you’re looking for alternatives, try using Nutella or any flavored nut butter. You can even make a simple vanilla cheesecake filling if you prefer a classic taste.
How long do these cheesecake cups last in the fridge?
Stored properly in an airtight container, they can last up to 4 days in the fridge. Just be sure to keep them chilled to maintain their creamy texture.
Can I freeze Cookie Butter Cheesecake Cups?
Yes, you can freeze them! Just make sure to wrap them tightly. When you’re ready to enjoy, let them thaw in the fridge for a few hours before serving.
What’s the best way to serve these cups?
For a fun presentation, serve them in clear cups to showcase the layers. Top with extra cookie butter or crushed cookies for a delightful finishing touch!
Final Thoughts
Creating Cookie Butter Cheesecake Cups is more than just whipping up a dessert; it’s about crafting a moment of joy. Each bite is a delightful blend of creamy cheesecake and the warm, spiced notes of cookie butter, making it a treat that feels special. Whether you’re sharing them with friends or savoring them solo, these cups bring a sense of indulgence without the fuss. Plus, the no-bake aspect means you can enjoy them even on the busiest days. So, roll up your sleeves, gather your ingredients, and let the sweet magic unfold in your kitchen!
Cookie Butter Cheesecake Cups are a delicious and easy dessert that combines the flavors of cookie butter and cheesecake in a convenient cup.
Ingredients
Scale
1 cup cream cheese, softened
1/2 cup granulated sugar
1/2 cup cookie butter
1 teaspoon vanilla extract
1 cup heavy whipping cream
1/4 cup powdered sugar
1/2 teaspoon ground cinnamon
12 mini graham cracker crusts (store-bought or homemade)
Extra cookie butter for drizzling (optional)
Crushed cookies for topping (optional)
Instructions
In a large mixing bowl, beat the softened cream cheese and granulated sugar together until smooth and creamy.
Add the cookie butter and vanilla extract to the cream cheese mixture and continue to beat until fully combined and smooth.
In a separate bowl, whip the heavy cream until soft peaks form. Gradually add the powdered sugar and ground cinnamon, continuing to whip until stiff peaks form.
Gently fold the whipped cream into the cookie butter mixture until well combined, being careful not to deflate the whipped cream.
Spoon or pipe the cheesecake filling into the mini graham cracker crusts, filling each one to the top.
If desired, drizzle extra cookie butter over the filled cups and sprinkle with crushed cookies for added texture.
Refrigerate the cheesecake cups for at least 2 hours before serving to allow them to set.
Notes
For a chocolate twist, use chocolate cookie butter instead of regular cookie butter.
You can also substitute the mini graham cracker crusts with chocolate cookie crusts for a richer flavor.