Introduction to Marbled Brownie Chocolate Chip Cookies – OMG!
There’s something magical about the combination of brownies and chocolate chip cookies. It’s like a sweet hug for your taste buds! These Marbled Brownie Chocolate Chip Cookies – OMG! are the perfect treat for any occasion. Whether you’re looking to impress friends at a gathering or simply want a quick solution for a busy day, this recipe has you covered. With rich flavors and a delightful texture, these cookies are sure to become a favorite in your household. Trust me, once you try them, you’ll be hooked!
Why You’ll Love This Marbled Brownie Chocolate Chip Cookies – OMG!
These Marbled Brownie Chocolate Chip Cookies – OMG! are a dream come true for any dessert lover. They’re incredibly easy to whip up, making them perfect for busy weeknights or last-minute gatherings. The rich, fudgy brownie flavor combined with the classic chocolate chip cookie taste creates a delightful treat that’s hard to resist. Plus, they bake in just 12 minutes, so you can satisfy your sweet tooth in no time!
Ingredients for Marbled Brownie Chocolate Chip Cookies – OMG!
Gathering the right ingredients is the first step to creating these delicious Marbled Brownie Chocolate Chip Cookies – OMG! Here’s what you’ll need:
Unsalted butter: This adds richness and helps create that soft, chewy texture.
Granulated sugar: Sweetens the cookies and contributes to their crisp edges.
Brown sugar: Packed with moisture, it gives a deeper flavor and chewy consistency.
Large eggs: Essential for binding the ingredients together and adding moisture.
Vanilla extract: A must-have for enhancing the overall flavor profile.
All-purpose flour: The base of the cookie dough, providing structure.
Unsweetened cocoa powder: This is what gives the brownie flavor; choose a good quality for the best taste.
Baking soda: Helps the cookies rise and become fluffy.
Salt: Just a pinch enhances all the flavors and balances the sweetness.
Semi-sweet chocolate chips: These are the classic choice, adding melty chocolate goodness.
White chocolate chips: They create a beautiful contrast and add a creamy sweetness.
For those looking to mix things up, consider adding chopped nuts like walnuts or pecans for a delightful crunch. You can also experiment with different types of chocolate chips, such as dark chocolate or even peanut butter chips, to create your own unique twist. Exact measurements for these ingredients can be found at the bottom of the article, ready for printing!
How to Make Marbled Brownie Chocolate Chip Cookies – OMG!
Now that you have all your ingredients ready, let’s dive into the fun part: making these Marbled Brownie Chocolate Chip Cookies – OMG! Follow these simple steps, and you’ll be on your way to cookie heaven in no time.
Step 1: Preheat and Prepare
First things first, preheat your oven to 350°F (175°C). This ensures your cookies bake evenly. While that’s heating up, line a baking sheet with parchment paper. This little trick prevents sticking and makes cleanup a breeze!
Step 2: Cream the Butter and Sugars
In a large mixing bowl, combine the softened butter, granulated sugar, and brown sugar. Use a hand mixer or a sturdy spoon to cream them together until the mixture is light and fluffy. This step is crucial; it adds air to the dough, making your cookies soft and chewy.
Step 3: Add Eggs and Vanilla
Next, crack in the eggs, one at a time. Mix well after each addition to ensure everything is blended perfectly. Then, stir in the vanilla extract. The aroma of vanilla will fill your kitchen, making it feel like a cozy bakery!
Step 4: Combine Dry Ingredients
In a separate bowl, whisk together the all-purpose flour, cocoa powder, baking soda, and salt. This step helps distribute the dry ingredients evenly, ensuring your cookies rise beautifully. Plus, it’s a great way to get a little workout in!
Step 5: Mix Wet and Dry Ingredients
Gradually add the dry mixture to the wet ingredients. Mix until just combined; don’t overdo it! You want to keep that dough nice and tender. Overmixing can lead to tough cookies, and nobody wants that!
Step 6: Fold in Chocolate Chips
Now, it’s time to fold in the semi-sweet chocolate chips. Gently mix them into the dough, ensuring they’re evenly distributed. This is where the magic happens—those gooey pockets of chocolate will make every bite irresistible!
Step 7: Create the Marbled Effect
Divide the dough in half. To one half, add the white chocolate chips and mix until they’re well incorporated. Now, take a tablespoon of the brownie dough and a tablespoon of the white chocolate chip dough. Place them side by side on the prepared baking sheet. With a toothpick or knife, gently swirl them together to create that beautiful marbled effect. It’s like art, but edible!
Step 8: Bake the Cookies
Pop the baking sheet into your preheated oven and bake for 10-12 minutes. Keep an eye on them! You want the edges to be set while the centers remain soft. This contrast is what makes these cookies so delightful.
Step 9: Cool and Enjoy
Once baked, let the cookies cool on the baking sheet for about 5 minutes. This allows them to firm up a bit. Then, transfer them to a wire rack to cool completely. The aroma wafting through your kitchen will be hard to resist, so be prepared for some eager taste testers!
Tips for Success
Use room temperature butter for easier creaming and a better texture.
Don’t skip the parchment paper; it prevents sticking and makes cleanup a breeze.
For a chewier cookie, slightly underbake them; they’ll continue to cook on the baking sheet.
Let the cookies cool completely before storing to maintain their freshness.
Experiment with different chocolate chip combinations for unique flavors!
Equipment Needed
Mixing bowls: A large bowl for mixing and a smaller one for dry ingredients. Any size works!
Hand mixer or whisk: A hand mixer speeds things up, but a whisk will do just fine.
Baking sheet: A standard sheet works, but a silicone mat can help with even baking.
Parchment paper: Essential for easy cleanup; aluminum foil is a good alternative.
Cookie scoop or spoon: For portioning dough; a spoon works if you don’t have a scoop!
Variations for Marbled Brownie Chocolate Chip Cookies – OMG!
Nutty Delight: Add 1/2 cup of chopped walnuts or pecans to the brownie dough for a crunchy texture.
Dark Chocolate Lovers: Swap out semi-sweet chocolate chips for dark chocolate chips for a richer flavor.
Peanut Butter Twist: Incorporate 1/2 cup of peanut butter chips along with the chocolate chips for a nutty surprise.
Gluten-Free Option: Use a gluten-free all-purpose flour blend to make these cookies suitable for gluten-sensitive friends.
Minty Fresh: Add a few drops of peppermint extract to the dough for a refreshing mint chocolate experience.
Serving Suggestions for Marbled Brownie Chocolate Chip Cookies – OMG!
Milk: A classic pairing! Serve these cookies with a cold glass of milk for the ultimate treat.
Ice Cream: Top a warm cookie with a scoop of vanilla ice cream for a decadent dessert.
Presentation: Arrange cookies on a colorful platter and dust with powdered sugar for a festive touch.
Coffee: Enjoy with a cup of coffee or espresso for a delightful afternoon pick-me-up.
FAQs about Marbled Brownie Chocolate Chip Cookies – OMG!
Can I make these cookies ahead of time? Absolutely! You can prepare the dough and refrigerate it for up to 3 days. Just scoop and bake when you’re ready for fresh cookies!
What’s the best way to store leftover cookies? Store your Marbled Brownie Chocolate Chip Cookies – OMG! in an airtight container at room temperature. They’ll stay fresh for about a week, but I doubt they’ll last that long!
Can I freeze the cookie dough? Yes! You can freeze the dough for up to 3 months. Just scoop the dough onto a baking sheet, freeze until solid, then transfer to a freezer bag. Bake straight from the freezer, adding a couple of extra minutes to the baking time.
What if I don’t have white chocolate chips? No worries! You can substitute with more semi-sweet chocolate chips or even try butterscotch chips for a different flavor twist.
How do I achieve the perfect marbled effect? The key is to gently swirl the two doughs together without overmixing. Use a toothpick or knife to create beautiful swirls, making each cookie unique!
Final Thoughts on Marbled Brownie Chocolate Chip Cookies – OMG!
Creating these Marbled Brownie Chocolate Chip Cookies – OMG! is more than just baking; it’s about crafting a moment of joy. The rich, fudgy brownie flavor combined with the classic chocolate chip cookie essence brings a smile to anyone who takes a bite. Whether you’re sharing them with friends or indulging solo, each cookie is a delightful experience. Plus, the marbled effect adds a touch of artistry that makes them visually stunning. So, roll up your sleeves, embrace the mess, and enjoy the sweet rewards of your efforts. Trust me, these cookies will become a cherished favorite!
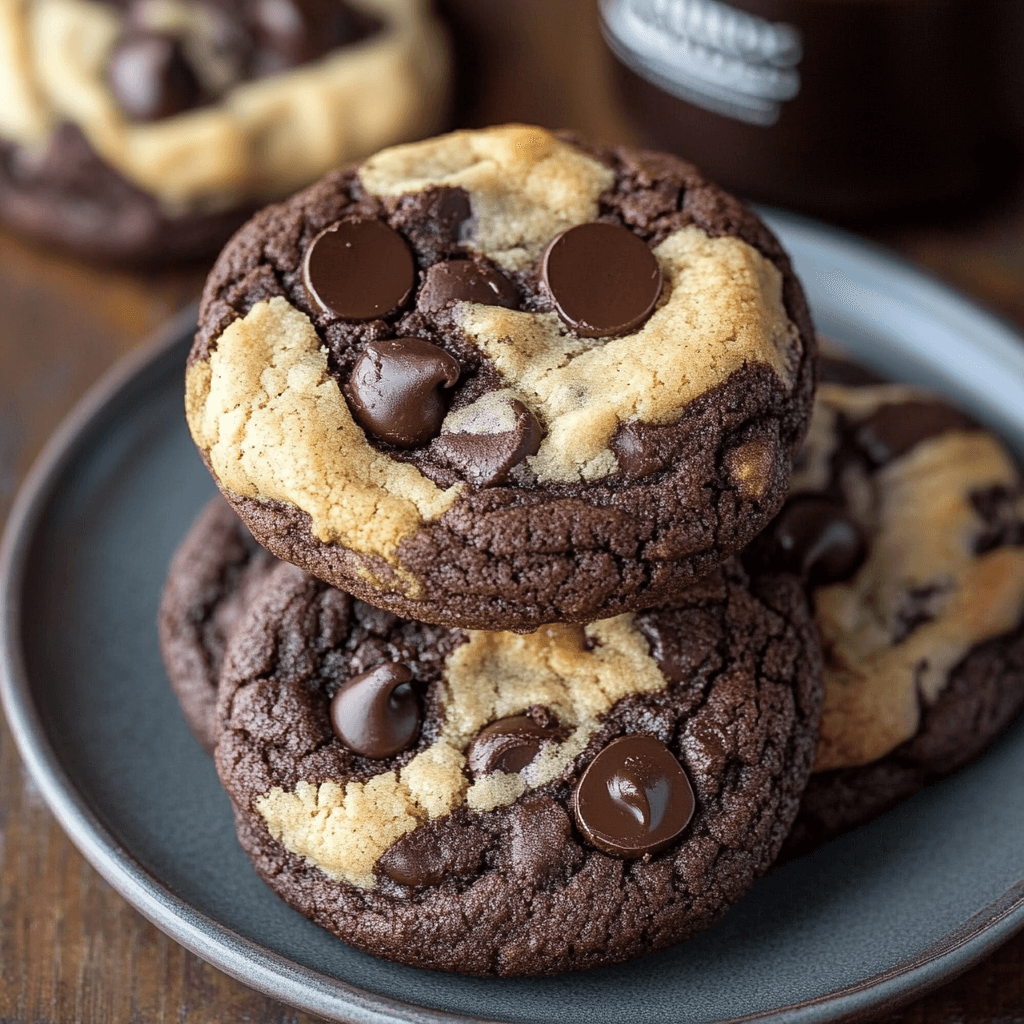
Delicious marbled brownie chocolate chip cookies that combine the rich flavors of brownies and chocolate chip cookies in one treat.
Ingredients
Scale
1 cup unsalted butter, softened
1 cup granulated sugar
1 cup brown sugar, packed
2 large eggs
1 teaspoon vanilla extract
2 cups all-purpose flour
1/2 cup unsweetened cocoa powder
1 teaspoon baking soda
1/2 teaspoon salt
1 cup semi-sweet chocolate chips
1/2 cup white chocolate chips
Instructions
Preheat your oven to 350°F (175°C) and line a baking sheet with parchment paper.
In a large mixing bowl, cream together the softened butter, granulated sugar, and brown sugar until light and fluffy.
Add the eggs one at a time, mixing well after each addition. Stir in the vanilla extract.
In a separate bowl, whisk together the flour, cocoa powder, baking soda, and salt. Gradually add the dry ingredients to the wet mixture, mixing until just combined.
Fold in the semi-sweet chocolate chips. Divide the dough in half. To one half, add the white chocolate chips and mix until evenly distributed.
To create the marbled effect, take a tablespoon of the brownie dough and a tablespoon of the white chocolate chip dough. Place them side by side on the prepared baking sheet, then gently swirl them together with a toothpick or knife.
Repeat until all the dough is used, spacing the cookies about 2 inches apart.
Bake in the preheated oven for 10-12 minutes, or until the edges are set but the centers are still soft.
Let the cookies cool on the baking sheet for 5 minutes before transferring them to a wire rack to cool completely.
Notes
For a nutty twist, add 1/2 cup of chopped walnuts or pecans to the brownie dough.
Experiment with different types of chocolate chips, such as dark chocolate or peanut butter chips, for a unique flavor.