


As I stood in my kitchen, the sweet aroma of butter and sugar creaming together felt like a warm hug on a chilly day. My latest attempt at a Matcha Marble Pound Cake was about to become a beloved staple in our home. This delightful cake isn’t just a feast for the eyes with its stunning green swirls; it’s a perfect blend of earthiness from the matcha and the comforting sweetness of vanilla. What makes this cake even better is its quick prep time—perfect for those surprise guests—and it’s a guaranteed crowd-pleaser that will leave everyone asking for seconds. Ready to elevate your baking game? Let’s dive into this charming recipe together!
Why is this cake a must-try?
Delightful, Unique Flavor: The combination of earthy matcha and sweet vanilla creates an unforgettable flavor profile that tantalizes the taste buds.
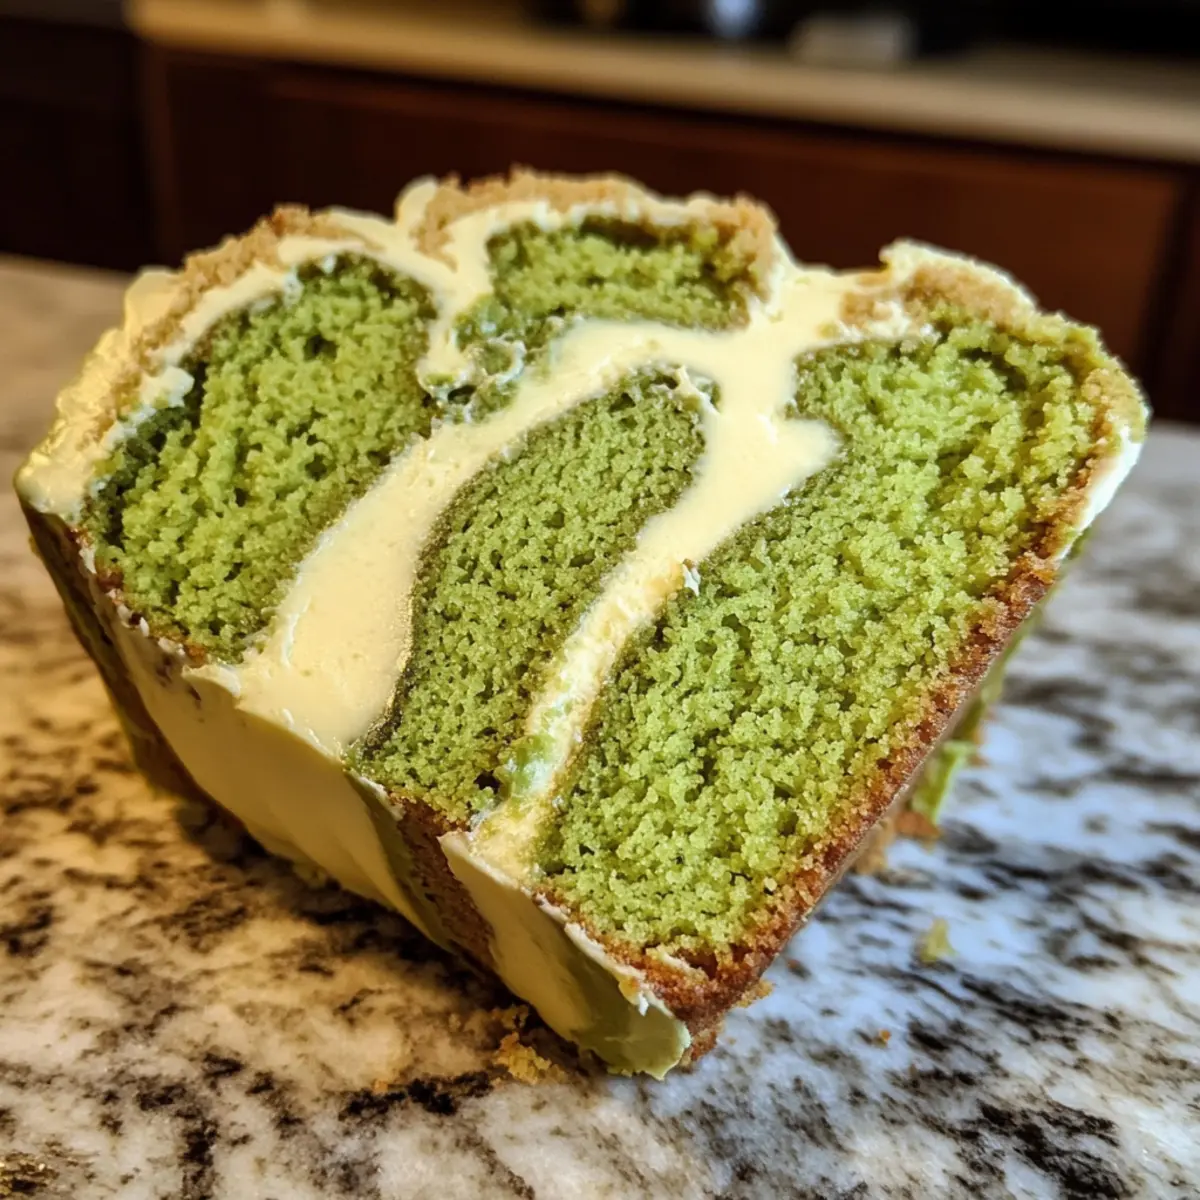
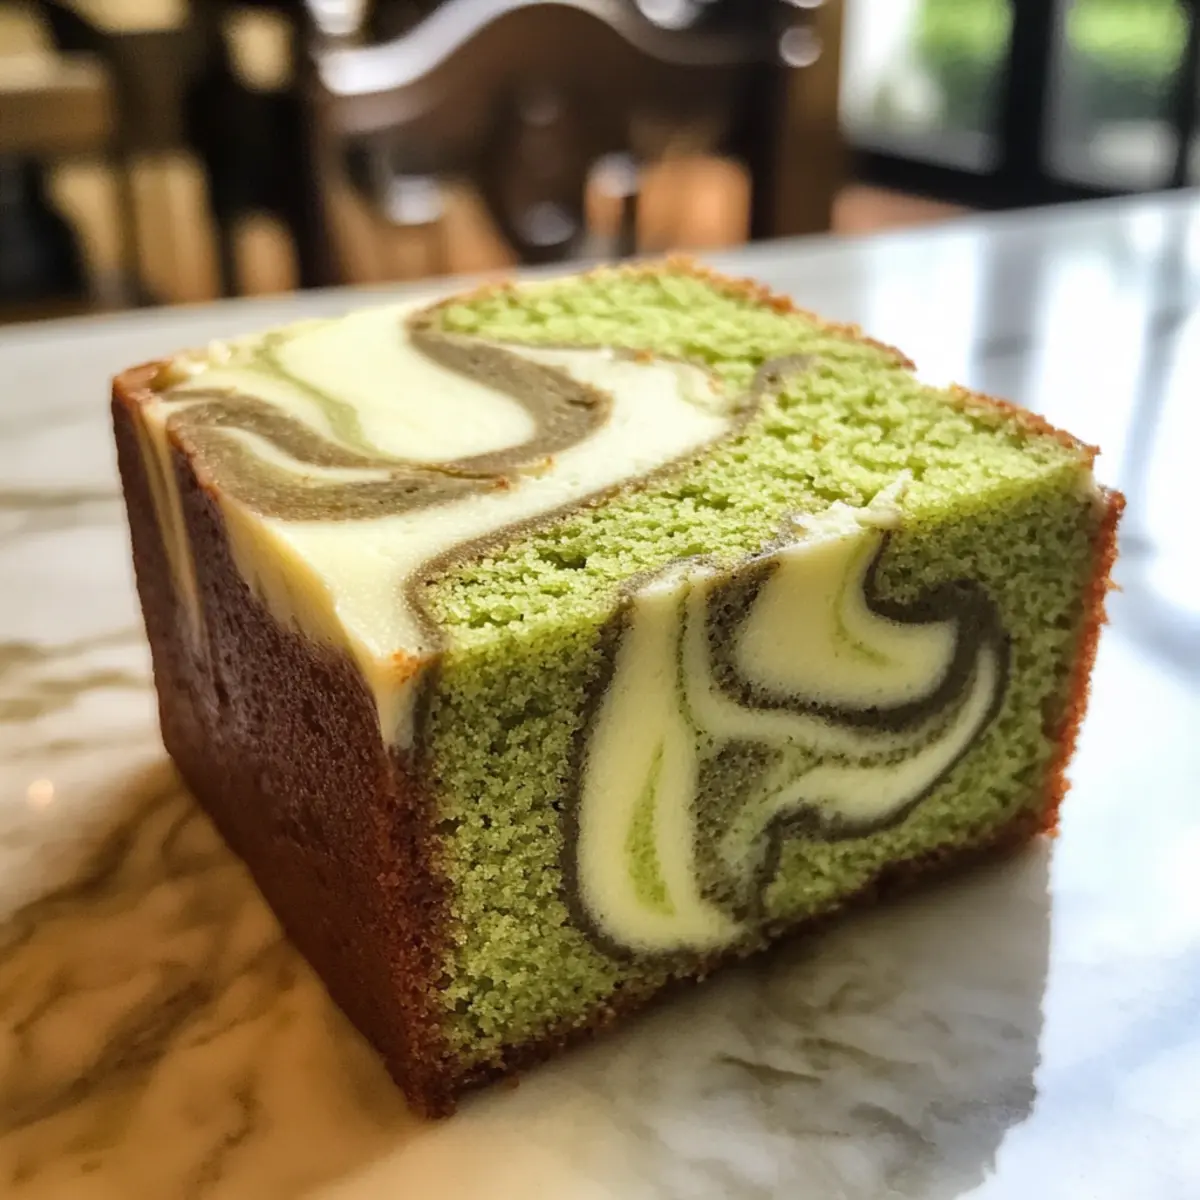
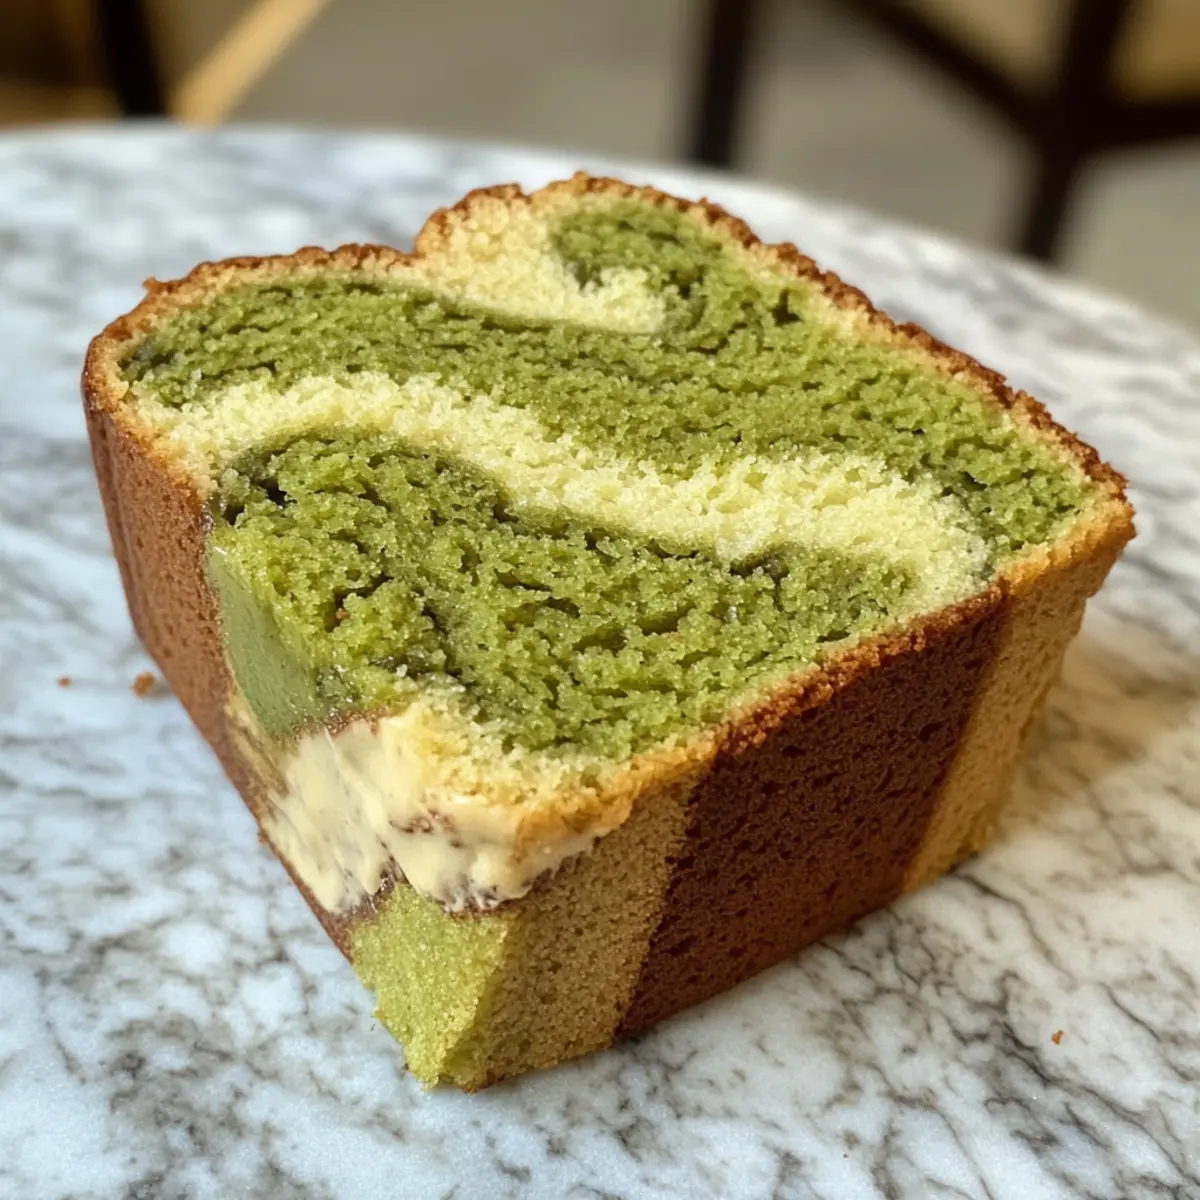
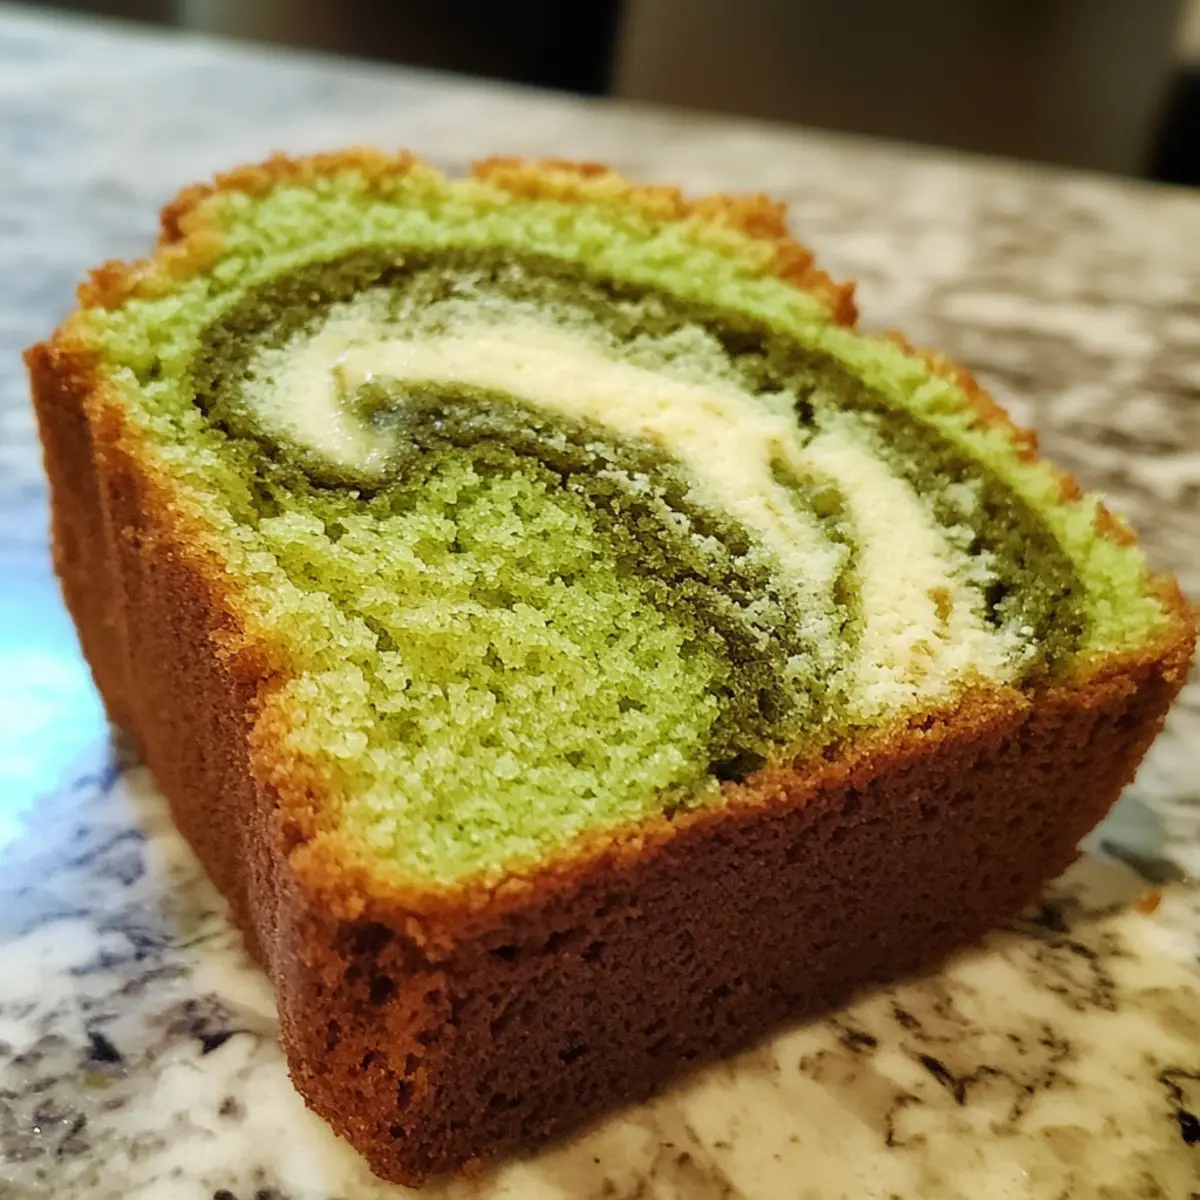
Visually Stunning: With its marbled design, this cake is not just delicious but also a showstopper that impresses at any gathering.
Quick and Easy: This recipe comes together in no time, making it perfect for those last-minute dessert cravings or surprise guests.
Crowd-Pleasing Appeal: This Matcha Marble Pound Cake has an irresistible charm that guarantees it will be a hit at celebrations, from brunch to birthdays. Serve it with a side of fresh fruit or alongside a slice of our delicious Pistachio Raspberry Cake for a dessert spread that dazzles!
Customize to Your Taste: Want a different twist? Try adding chocolate chips or a layer of cream cheese frosting for an exciting variation that will wow your guests!
Matcha Marble Pound Cake Ingredients
For the Cake
• Butter – provides moisture and richness; use unsalted for better control over saltiness.
• Sugar – sweetens the cake and contributes to its tender crumb; brown sugar can be a substitute for added depth.
• Eggs – acts as a binder and adds structure; room temperature eggs ensure better incorporation.
• All-Purpose Flour – gives the cake structure; gluten-free flour can be used for a gluten-free version.
• Baking Powder – leavening agent that helps the cake rise; ensure it’s fresh for the best results.
• Milk – adds moisture and helps create a tender crumb; almond milk or any dairy-free option can be a substitute.
• Matcha Powder – provides the signature flavor and color; ensure you are using culinary-grade matcha for the best taste.
• Vanilla Extract – adds depth of flavor; pure vanilla extract is recommended, but imitation can be used in a pinch.
Step‑by‑Step Instructions for Matcha Marble Pound Cake
Step 1: Preheat the Oven
Start by preheating your oven to 350°F (175°C) and preparing your loaf pan by greasing it generously with butter or lining it with parchment paper. This ensures that your delicious Matcha Marble Pound Cake releases easily once baked. Set the prepared pan aside as you gather the remaining ingredients for an efficient baking session.
Step 2: Cream the Butter and Sugar
In a large mixing bowl, cream together the unsalted butter and sugar with an electric mixer until the mixture is light and fluffy. This process takes about 3-5 minutes and is crucial for incorporating air into your batter, giving your cake a tender crumb. Once fluffy, you’ll notice a pale, creamy texture, signaling that it’s ready for the next step.
Step 3: Add the Eggs
Next, crack in the room temperature eggs one at a time, mixing well after each addition. This allows the eggs to fully incorporate, providing structure to your Matcha Marble Pound Cake. After adding all the eggs, continue mixing until the batter is smooth and homogenous, with no streaks of egg remaining.
Step 4: Combine Dry Ingredients
In a separate bowl, whisk together the all-purpose flour, baking powder, and a pinch of salt. This step is essential for ensuring even distribution of the leavening agent. Take a moment to admire the texture of your flour mixture, as it should be light and airy—perfect for producing a well-risen cake.
Step 5: Incorporate the Dry Mixture
Gradually add the dry ingredients to the wet mixture, alternating with the milk to prevent the batter from clumping. Begin with a scoop of the flour mixture, followed by a splash of milk, continuing this pattern until all ingredients are fully combined. Mix gently until just incorporated to maintain the fluffiness of your Matcha Marble Pound Cake.
Step 6: Prepare the Matcha Batter
Now, divide your batter into two equal bowls. In one bowl, gently fold in the culinary-grade matcha powder until it is fully incorporated and the color is vibrant. The other bowl will remain plain, showcasing the lovely contrast of colors in your final cake. This step creates the beautiful marbling effect you desire.
Step 7: Marble the Batter
Spoon alternating dollops of the matcha and plain batter into your prepared loaf pan. Once you have added all the batter, use a knife or skewer to gently swirl the mixtures together, being careful not to overmix. You’ll want to see distinct green and vanilla layers, creating the classic look of a Matcha Marble Pound Cake.
Step 8: Bake the Cake
Place the loaf pan in the preheated oven and bake for 50-60 minutes. Keep an eye on the cake, and it’s done when a toothpick inserted into the center comes out clean or with just a few moist crumbs. Your kitchen will fill with an inviting aroma, and the cake will be golden brown on top.
Step 9: Cool and Serve
Once baked, remove the loaf pan from the oven and let it cool for about 10 minutes. After the initial cooling period, carefully transfer your Matcha Marble Pound Cake to a wire rack to cool completely. This will help maintain its soft, moist texture, and it’s now ready to slice and serve to delighted family and friends.
Matcha Marble Pound Cake Variations
Feel free to mix things up and make this cake your own with these exciting variations!
- Dairy-Free: Substitute regular milk with almond milk or coconut milk to create a delightful dairy-free version.
- Gluten-Free: Swap all-purpose flour with a gluten-free flour blend; ensure it has a binding agent like xanthan gum for best results.
- Choco-Matcha Delight: Add a handful of chocolate chips to either the matcha or vanilla batter for a sweet surprise in every slice.
- Nutty Touch: Fold in chopped nuts like walnuts or pistachios for a lovely crunch that complements the soft cake. The addition of nuts not only adds texture but also enriches the flavor profile.
- Fruity Swirl: Mix in some fresh berries, such as raspberries or blueberries, into the vanilla batter before marbling for a burst of fruity goodness.
- Citrus Zing: Add zest from an orange or lemon to the vanilla batter for a hint of citrus freshness that brightens the cake. It’s a refreshing twist that elevates the whole flavor experience!
- Cream Cheese Frosting: Once cooled, slather a layer of cream cheese frosting on top for an indulgent treat; the tangy frosting pairs beautifully with the matcha.
Want more ideas? Try serving slices alongside a scoop of homemade vanilla ice cream or sharing a slice with a friend over a warm cup of green tea. And don’t forget to explore our delicious Strawberry Cake Sweet, which also celebrates those delightful flavors!
Expert Tips for Matcha Marble Pound Cake
-
Room Temperature Ingredients: Ensure all ingredients, particularly butter and eggs, are at room temperature. This helps achieve a smooth batter, ensuring your Matcha Marble Pound Cake is light and fluffy.
-
Avoid Overmixing: Gently mix the batter when combining wet and dry ingredients. Overmixing can lead to a dense cake instead of the desired tender crumb.
-
Quality Matcha Matters: Always opt for culinary-grade matcha powder for the best flavor and vivid color in your cake. Low-quality matcha can result in a bitter taste.
-
Baking Time Check: Bake until a toothpick comes out clean or with just a few moist crumbs. Keep an eye on the cake after 50 minutes, as ovens may vary in temperature.
-
Marble Technique: When swirling the batters together, use a gentle hand to maintain that beautiful marble effect without fully blending them. This enhances both appearance and taste!
How to Store and Freeze Matcha Marble Pound Cake
Room Temperature: Store the cooled Matcha Marble Pound Cake wrapped in plastic wrap or in an airtight container at room temperature for up to 3 days to keep it moist and fresh.
Fridge: For slightly longer storage, refrigerate the wrapped cake for up to 1 week. Note that refrigeration can affect the cake’s texture, so let it come to room temperature before serving.
Freezer: To freeze, wrap the cooled cake tightly in plastic wrap and foil to prevent freezer burn. It can be frozen for up to 2 months. When ready to enjoy, thaw it overnight in the refrigerator.
Reheating: If you prefer it warm, you can slice the Matcha Marble Pound Cake and gently reheat individual pieces in the microwave for about 10-15 seconds. Enjoy the delightful flavors fresh!
Make Ahead Options
This Matcha Marble Pound Cake is a fantastic choice for busy home cooks looking to save time! You can prepare the batter up to 24 hours in advance, ensuring a delightful dessert is always on hand. Simply follow the instructions up to Step 6, then cover the individual bowls of batter with plastic wrap and refrigerate. This helps preserve the flavors and maintains the cake’s moist texture. When you’re ready to bake, allow the batters to come to room temperature, then proceed with Steps 7 through 9. By prepping ahead, you’ll have a delectably fresh cake with minimal effort—perfect for unexpected gatherings!
What to Serve with Matcha Marble Pound Cake
Create a delightful meal that tantalizes your senses and complements this striking dessert perfectly.
- Fresh Berries: Add a burst of freshness with strawberries or blueberries to cut through the sweetness while enhancing the cake’s vibrant colors.
- Whipped Cream: A dollop of lightly sweetened whipped cream introduces a fluffy texture that beautifully complements the dense cake.
- Green Tea: Serve a cup of freshly brewed green tea to harmonize with the matcha flavor and create a soothing experience at any gathering.
- Chocolate Drizzle: A rich chocolate drizzle adds a decadent touch, balancing the earthy notes of matcha with sweet indulgence.
- Vanilla Ice Cream: Pair with a scoop of smooth vanilla ice cream to create a dreamy mix of temperatures and textures.
- Powdered Sugar Dusting: A light sprinkle of powdered sugar adds an elegant finish, elevating the cake’s presentation while contributing a hint of sweetness.
- Ginger Cookies: Serve alongside spicy ginger cookies to add contrast and enhance the overall flavor experience.
- Citrus Salad: A refreshing citrus salad with oranges and grapefruits can cleanse the palate and brighten the meal.
Matcha Marble Pound Cake Recipe FAQs
How do I choose the right matcha powder for this cake?
Absolutely! For the best flavor, always opt for culinary-grade matcha powder, which is specifically designed for baking rather than drinking. This type has a vibrant green color and a sweeter, richer taste compared to ceremonial-grade matcha, which can be more bitter and grassy.
How should I store my Matcha Marble Pound Cake?
You can keep your cooled Matcha Marble Pound Cake wrapped tightly in plastic wrap or stored in an airtight container at room temperature for up to 3 days. If you want it to last longer, refrigerate it wrapped for up to a week. Just be aware that refrigeration can change the texture slightly, so allow it to warm up a bit before serving for the best experience!
Can I freeze the Matcha Marble Pound Cake?
Absolutely! To freeze, first let the cake cool completely. Then, wrap it tightly in plastic wrap and then in foil to prevent freezer burn. This cake can be frozen for up to 2 months. When you’re ready to enjoy it, simply thaw it overnight in the fridge, and if you prefer, warm up slices in the microwave for 10-15 seconds.
What should I do if my cake is too dense?
Oh no! If your Matcha Marble Pound Cake turns out too dense, it might be due to overmixing the batter or not using room temperature ingredients. Be sure to mix just until combined, especially when incorporating dry and wet ingredients. Make sure your butter and eggs are at room temperature for best results too!
Is this recipe suitable for people with gluten or dairy allergies?
Definitely! You can easily substitute the all-purpose flour with a gluten-free blend that’s suitable for baking, and opt for plant-based milk like almond or oat milk to make it dairy-free. Just check that your matcha powder doesn’t contain any additives that might not be gluten-free. Happy baking!
Delicious Matcha Marble Pound Cake: A Sweet Twist on Tradition
Ingredients
Equipment
Method
- Preheat your oven to 350°F (175°C) and prepare your loaf pan by greasing it generously with butter or lining it with parchment paper.
- In a large mixing bowl, cream together the unsalted butter and sugar with an electric mixer until the mixture is light and fluffy.
- Add the room temperature eggs one at a time, mixing well after each addition until the batter is smooth.
- In a separate bowl, whisk together the all-purpose flour, baking powder, and a pinch of salt.
- Gradually add the dry ingredients to the wet mixture, alternating with the milk until fully combined.
- Divide the batter into two equal bowls. In one, gently fold in the matcha powder.
- Spoon alternating dollops of the matcha and plain batter into your prepared loaf pan and swirl gently with a knife.
- Bake for 50-60 minutes, checking for doneness with a toothpick.
- Let the cake cool for about 10 minutes in the pan, then transfer to a wire rack to cool completely.