


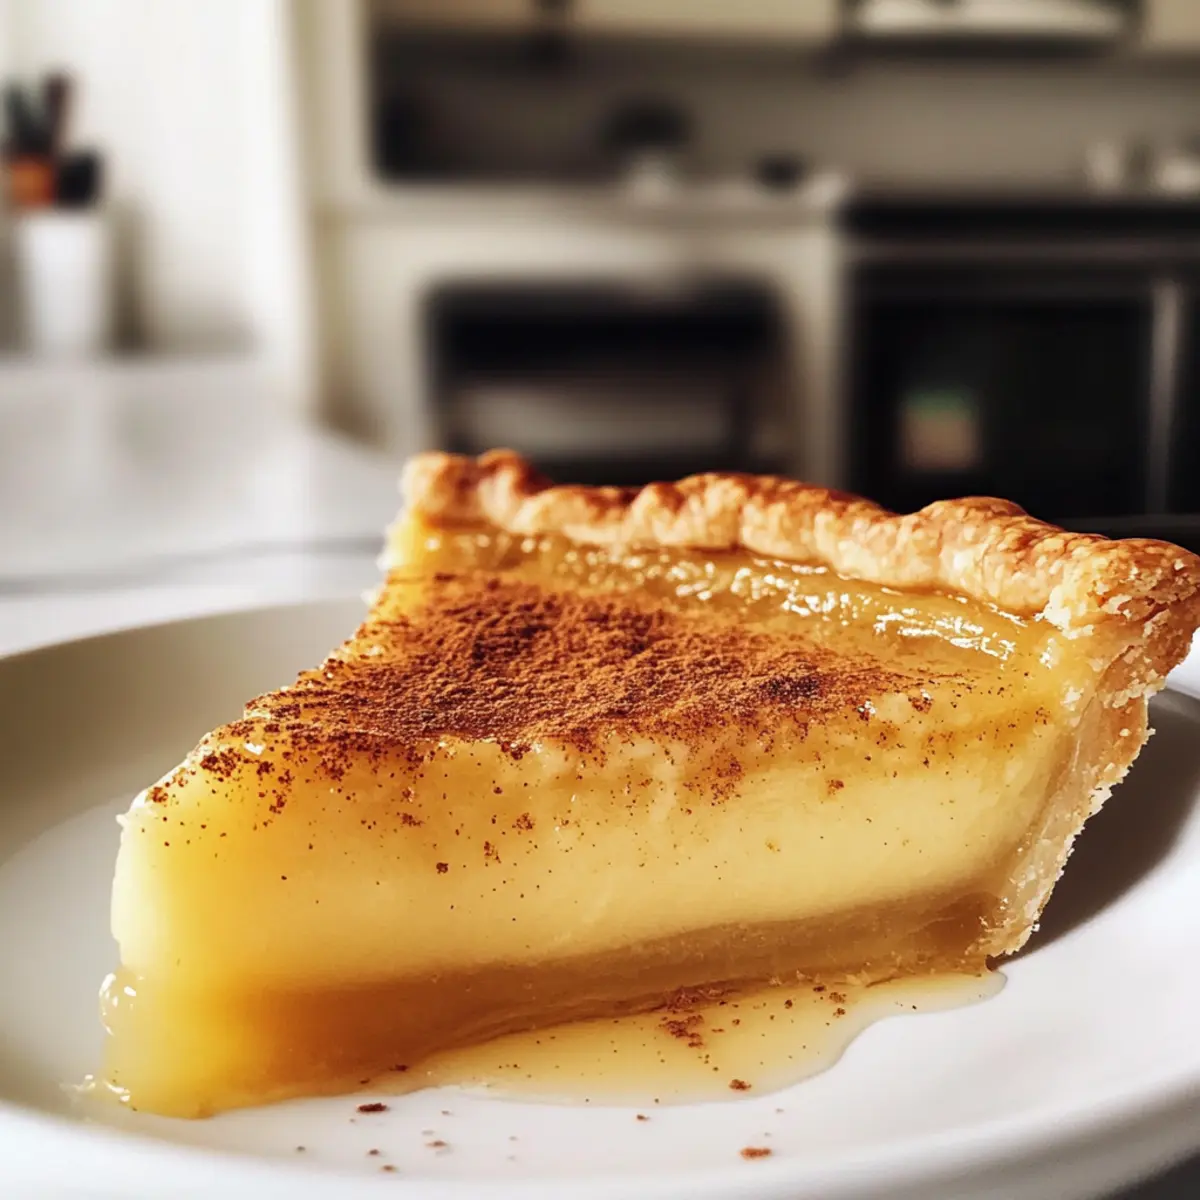
As I took my first bite of Melopita Greek Honey Pie, I was transported to the sun-drenched hills of Sifnos, where this delightful dessert is a staple of family gatherings. With its creamy, ricotta filling kissed by sweet honey and warm cinnamon, this pie offers a taste of Mediterranean magic that’s perfect for any occasion. You’ll love how easy it is to whip up, whether you choose the traditional crusted version or opt for the gluten-free crustless twist. Not only is it a crowd-pleaser, but it also reminds us that homemade desserts can be both comforting and elegant. Are you ready to bring a piece of Greece into your kitchen? Let’s dive into this deliciously simple recipe!
Why is Melopita Greek Honey Pie irresistible?
Authentic Greek Flavor: Each slice transports you to Greece, with flavors reminiscent of sun-kissed Mediterranean summers.
Easy to Make: This recipe is straightforward, perfect for both novice and experienced bakers alike.
Versatile Delight: Enjoy it warm or chilled, as a dessert or a delightful snack paired with coffee.
Gluten-Free Option: Can easily be made crustless, accommodating dietary preferences while maintaining its deliciousness.
Crowd-Pleasing Treat: This creamy, honey-kissed pie is sure to impress at any gathering, from casual get-togethers to festive celebrations.
Indulge in the comforting charm of homemade desserts that are not only elegant but also simple to prepare. If you enjoy Mediterranean recipes, you might also love our ideas for Greek Bowls with Halloumi or the delightful Salted Sage Honey Butter Brioche Rolls.
Melopita Greek Honey Pie Ingredients
For the Crust
- Gluten-free flour or all-purpose flour – Provides structure for the pie crust; substitute with a gluten-free blend if needed.
- Salt – Enhances flavor in the crust.
- Sugar – Sweetens the crust; can be adjusted according to preference.
- Unsalted butter (cold, cubed) – Adds richness to the crust; must be cold for proper texture.
- Vinegar – Helps create a flaky crust; use white vinegar or apple cider vinegar.
- Ice water – Binds the dough; add as needed to achieve a consistent texture.
For the Filling
- Large eggs – Create a custard-like filling; use at room temperature for proper emulsification.
- Honey – Natural sweetener for the filling; opt for wild blossom or floral honey for best results.
- Ground cinnamon – Adds a warm spice to the filling; adjust to taste for a cozy flavor profile.
- Cornstarch – Stabilizes the filling; flour can be used as an alternative thickener.
- Fresh lemon juice – Brightens the filling; can substitute with lime juice if preferred.
- Vanilla extract – Enhances the overall flavor of the pie.
- Ricotta cheese (or traditional myzithra, drained) – Main component of the filling; choose myzithra for the most authentic taste.
For Garnishing
- Extra honey and cinnamon – Delicious toppings for the finished pie, enhancing its look and flavor.
Get ready to create a stunning Melopita Greek Honey Pie that is sure to be a centerpiece at your next gathering!
Step‑by‑Step Instructions for Melopita Greek Honey Pie
Step 1: Preheat the Oven
Begin by preheating your oven to 400°F (200°C). This ensures the right temperature for baking your pie crust to perfection. While the oven warms up, prepare your baking area, gathering all necessary ingredients and equipment to facilitate a smooth cooking process.
Step 2: Make the Pie Crust
In a food processor, combine gluten-free or all-purpose flour, salt, and sugar. Pulse in the cold, cubed unsalted butter until the mixture resembles coarse crumbs. This process should take about 30 seconds. The cold butter is crucial for achieving a flaky texture, setting the foundation for your Melopita Greek Honey Pie.
Step 3: Form the Dough
Add vinegar and ice water to the crumb mixture in the processor. Pulse until the dough begins to come together, which should take roughly 10 pulses. Once ready, transfer the dough to a clean surface, shape it into a disc, wrap it in plastic wrap, and refrigerate for at least 30 minutes. Chilling helps maintain the butter’s coldness for a tender crust.
Step 4: Roll Out the Dough
After chilling, remove one disc of dough from the fridge and roll it out on a floured surface into a circle about 12 inches in diameter. Carefully transfer the rolled dough to a 9-inch pie dish, pressing it evenly along the sides and bottom. Prick the base with a fork to prevent bubbles during baking, and refrigerate again for 15 minutes to keep the crust firm.
Step 5: Par-Bake the Crust
Place parchment paper over the chilled crust and fill it with pie weights or dried beans. Par-bake in your preheated oven for 10 minutes until the edges are lightly golden. This step helps set your crust before adding the creamy filling of the Melopita Greek Honey Pie, preventing it from becoming soggy.
Step 6: Prepare the Filling
Reduce the oven temperature to 350°F (175°C) while preparing the filling. In a mixing bowl, whisk the large eggs and honey together until light and fluffy, about 3-5 minutes. Incorporating air into this mixture will give your filling a delightful lightness, essential for the creamy texture of the Melopita.
Step 7: Combine Ingredients
Add ground cinnamon, cornstarch, salt, fresh lemon juice, and vanilla extract to the egg-honey mix. Stir until everything is evenly combined, ensuring that the flavors meld beautifully. This mixture will serve as the luscious filling that makes Melopita Greek Honey Pie so irresistible.
Step 8: Fold in the Ricotta
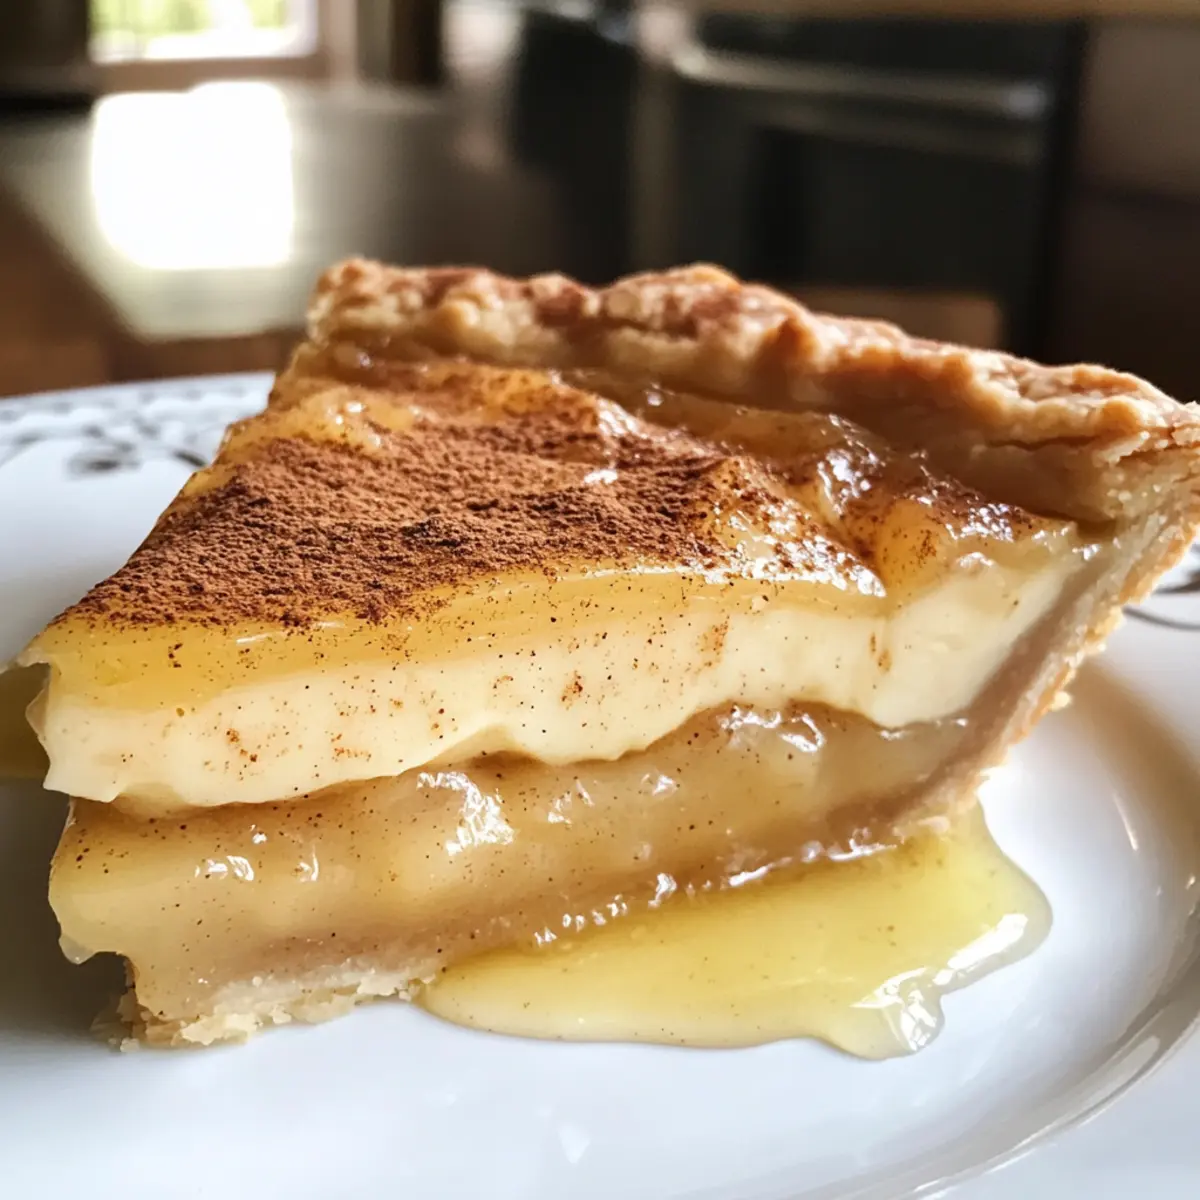
Next, gently fold in the ricotta cheese (or myzithra) until the mixture is smooth and uniform. Be careful not to overmix, as you want to maintain a light and airy texture in your filling. Once incorporated, you’re ready to pour this delightful blend into the pre-baked crust.
Step 9: Bake the Pie
Pour the filling into the cooled, par-baked crust and smooth the top. Bake in the 350°F (175°C) oven for approximately 25–35 minutes, or until the filling is just set but still slightly jiggly in the center. The Melopita should have a light golden color on top, indicating that it is perfectly baked.
Step 10: Cool the Pie
Once baked, remove the pie from the oven and allow it to cool on a wire rack for about 1–2 hours. This cooling step lets the filling set further, making for cleaner slices. For the best flavor and texture, chill the pie in the refrigerator before serving.
Step 11: Garnish and Serve
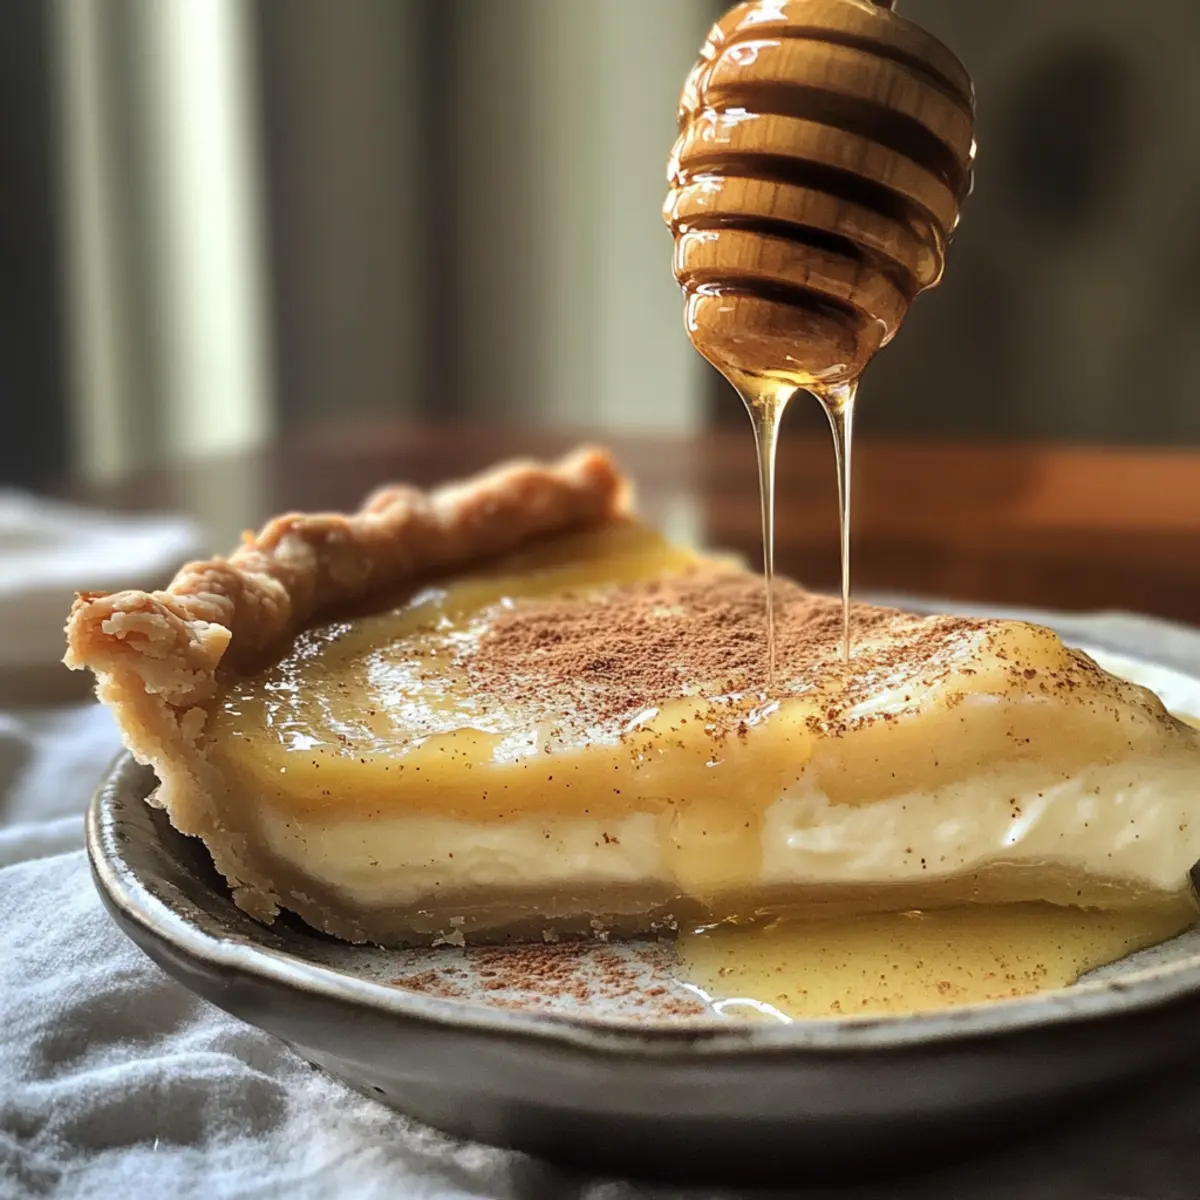
When you’re ready to serve the Melopita Greek Honey Pie, drizzle it with extra honey and sprinkle ground cinnamon on top for added sweetness and visual appeal. You can also garnish with honeycomb or toasted nuts for an extra touch. Enjoy the fresh flavors and warm aromas of your delightful creation!

Storage Tips for Melopita Greek Honey Pie
-
Fridge: Store your Melopita Greek Honey Pie in an airtight container in the refrigerator for up to 3–4 days. The flavors will meld and become even more delicious the next day!
-
Freezer: For longer storage, freeze the pie wrapped tightly in plastic wrap followed by aluminum foil for up to 2 months. Thaw in the fridge before serving.
-
Reheating: To enjoy leftovers, warm slices in the microwave for 15-20 seconds or in the oven at 350°F (175°C) for about 10 minutes until heated through.
-
Serving: The pie is delightful served chilled or at room temperature. Drizzle with extra honey and sprinkle cinnamon before serving for an extra touch of sweetness.
Make Ahead Options
Prepare your Melopita Greek Honey Pie ahead of time to make weeknight desserts a breeze! You can make the crust up to 24 hours in advance; just roll it out and store it wrapped in the refrigerator. The filling can also be prepared 24 hours ahead—simply whisk together the eggs, honey, cinnamon, and other ingredients, then cover and refrigerate. When you’re ready to bake, pour the filling into the chilled crust and bake as directed. This not only saves time but also allows the flavors to meld beautifully, making your Melopita just as delicious when served fresh as when made last minute. Enjoy a slice of Greece with less stress!
Melopita Greek Honey Pie Variations
Feel free to make this Melopita Greek Honey Pie your own with some wonderful twists and substitutions that’ll tickle your taste buds.
-
Citrus Zing: Add orange zest to the filling for a refreshing citrus lift that brightens the beautiful honey flavors. It’s a delightful accent that complements the pie’s sweetness.
-
Nutty Crunch: Top your Melopita with toasted almonds or walnuts. This addition brings a beautiful crunch that contrasts beautifully with the creamy filling, elevating each bite.
-
Creamy Swap: Opt for cream cheese or mascarpone instead of ricotta for a richer, velvety smooth filling. This variation adds a luxurious touch, perfect for special occasions.
-
Spice It Up: For a subtle kick, include a pinch of nutmeg along with the cinnamon. This warming, aromatic spice will give your pie an inviting depth, making every slice truly comforting.
-
Gluten-Free Delight: Choose a gluten-free flour blend for the crust. This ensures everyone can enjoy this delectable dessert without compromising on taste or texture.
-
Caramel Drizzle: Drizzle homemade or store-bought caramel sauce over the top before serving. The sweet, buttery flavor adds a delightful contrast to the honey sweetness, promising a show-stopping dessert.
-
Lower Sugar: For a healthier option, reduce the honey and sugar in the filling. The natural sweetness from the ricotta and spices will still shine through beautifully.
Whichever variation you choose, this Melopita Greek Honey Pie is sure to be a hit! And if you’re craving more Mediterranean delights, consider whipping up some Greek Bowls with Halloumi or even experimenting with our convenient Salted Sage Honey Butter Brioche Rolls. Happy baking!
Expert Tips for Melopita Greek Honey Pie
-
Cold Butter Necessity: Ensure your unsalted butter is cold to achieve a flaky crust; warm butter will yield a dense texture.
-
Room Temperature Eggs: Use large eggs at room temperature; this helps create a luscious custard-like filling for your Melopita Greek Honey Pie.
-
Mind the Baking Time: Keep an eye on your pie as it bakes; overcooking can lead to a dry filling. Look for a slight jiggle in the center.
-
Chill for Clean Slices: Allow the pie to cool for 1–2 hours, then refrigerate before slicing. This will give you neat, beautiful pieces to serve.
-
Customize Your Flavor: Don’t hesitate to adjust the spices! Adding orange zest or swapping vanilla for almond extract can give a delightful twist to your Melopita.
What to Serve with Melopita Greek Honey Pie?
To elevate your dining experience, consider pairing flavors that harmonize beautifully with this honey-kissed dessert.
-
Rich Greek Yogurt:
A dollop of creamy Greek yogurt balances the sweetness of the pie, adding a lovely tang that enhances each bite. -
Fresh Berries:
Juicy berries like strawberries or blueberries provide a refreshing contrast, while their vibrant colors brighten the plate. -
Mint Tea:
The aromatic notes of mint tea bring a refreshing touch, making it a perfect companion, especially for warm evenings. -
Almond Biscotti:
Crunchy biscotti complements the creamy texture of the Melopita, offering a delightful bite for a satisfying snack experience. -
Honey Drizzle:
Adding a drizzle of high-quality honey on top intensifies the flavors and gives a luxurious touch to each slice. -
Pistachio Ice Cream:
The nutty flavors from creamy pistachio ice cream yield a delicious contrast, enhancing the Mediterranean experience with every spoonful.
Indulging in these delightful pairings while enjoying your Melopita Greek Honey Pie will make every gathering even more memorable, transporting everyone to the sun-soaked shores of Greece.
Melopita Greek Honey Pie Recipe FAQs
What type of flour is best for Melopita Greek Honey Pie?
I recommend using gluten-free flour or all-purpose flour based on your preference. If you’re aiming for a gluten-free version, a blend specifically designed for baking works great. You want a flour that can hold up the creamy filling while maintaining a tender crust.
How should I store the Melopita Greek Honey Pie?
Store your Melopita Greek Honey Pie tightly covered in an airtight container in the refrigerator for up to 3–4 days. As the flavors meld together over time, this dessert can become even more delicious! Just make sure it’s well-wrapped to keep its creamy texture intact.
Can I freeze Melopita Greek Honey Pie?
Absolutely! To freeze, wrap the pie tightly in plastic wrap and then in aluminum foil to prevent freezer burn. It will keep for up to 2 months. When ready to enjoy, simply thaw it in the refrigerator overnight before serving to help maintain the best texture and flavor.
What can I do if my filling is too runny?
If your filling turns out too runny after baking, it could be due to insufficient baking time or too much liquid. To fix this in the future, ensure you bake until the filling is just set with a slight jiggle in the center, usually around 25–35 minutes, and consider adding a bit more cornstarch if needed for thickening.
Are there any allergy concerns with this recipe?
Yes, this recipe does contain eggs and dairy (ricotta cheese). If you’re serving a mixed group, make sure to ask about any allergies. For a dairy-free version, you can experiment with a vegan ricotta substitute, though the texture and flavor may vary slightly.
What’s the best way to garnish Melopita Greek Honey Pie?
For an eye-catching presentation, drizzle extra honey over the chilled pie and sprinkle ground cinnamon on top before serving. You could also add desserts like honeycomb or toasted nuts for added texture and flavor that beautifully complements the creamy filling!
Melopita Greek Honey Pie – A Sweet Escape to Greece
Ingredients
Equipment
Method
- Preheat the oven to 400°F (200°C).
- In a food processor, combine gluten-free or all-purpose flour, salt, and sugar. Pulse in the cold, cubed unsalted butter until the mixture resembles coarse crumbs.
- Add vinegar and ice water to the crumb mixture in the processor. Pulse until the dough begins to come together, then transfer the dough to a clean surface, shape it into a disc, wrap it in plastic wrap, and refrigerate for at least 30 minutes.
- Remove one disc of dough from the fridge and roll it out on a floured surface into a circle about 12 inches in diameter. Carefully transfer the rolled dough to a 9-inch pie dish, pressing it evenly along the sides and bottom. Prick the base with a fork and refrigerate again for 15 minutes.
- Place parchment paper over the chilled crust and fill it with pie weights or dried beans. Par-bake in your preheated oven for 10 minutes until the edges are lightly golden.
- Reduce the oven temperature to 350°F (175°C). In a mixing bowl, whisk the large eggs and honey together until light and fluffy, about 3-5 minutes.
- Add ground cinnamon, cornstarch, salt, fresh lemon juice, and vanilla extract to the egg-honey mix. Stir until everything is evenly combined.
- Gently fold in the ricotta cheese (or myzithra) until the mixture is smooth and uniform.
- Pour the filling into the cooled, par-baked crust and smooth the top. Bake for approximately 25–35 minutes, or until the filling is just set but still slightly jiggly in the center.
- Remove the pie from the oven and allow it to cool on a wire rack for about 1–2 hours. For best flavor and texture, chill the pie in the refrigerator before serving.
- When ready to serve, drizzle with extra honey and sprinkle ground cinnamon on top for added sweetness and visual appeal.